Facebook Integration

About
If you would like to send and receive messages from a Facebook Page through Echo, you can integrate that page with Echo. This integration would also provide the ability to manage public comments on your Facebook posts and Facebook live videos.
Setup Instructions
To begin the Facebook integration with Echo, as an Administrator in Echo, go to Admin>Integrations>Facebook Services
In a separate browser window from Echo, log into your Facebook account (the one that has Admin access to the Facebook page you want to connect).
Back on the Echo screen, click on Click here to login to Facebook

A pop-up box will appear, click on Log in With Facebook

If this is your first time connecting this Facebook page to Echo, it will ask you to edit settings.
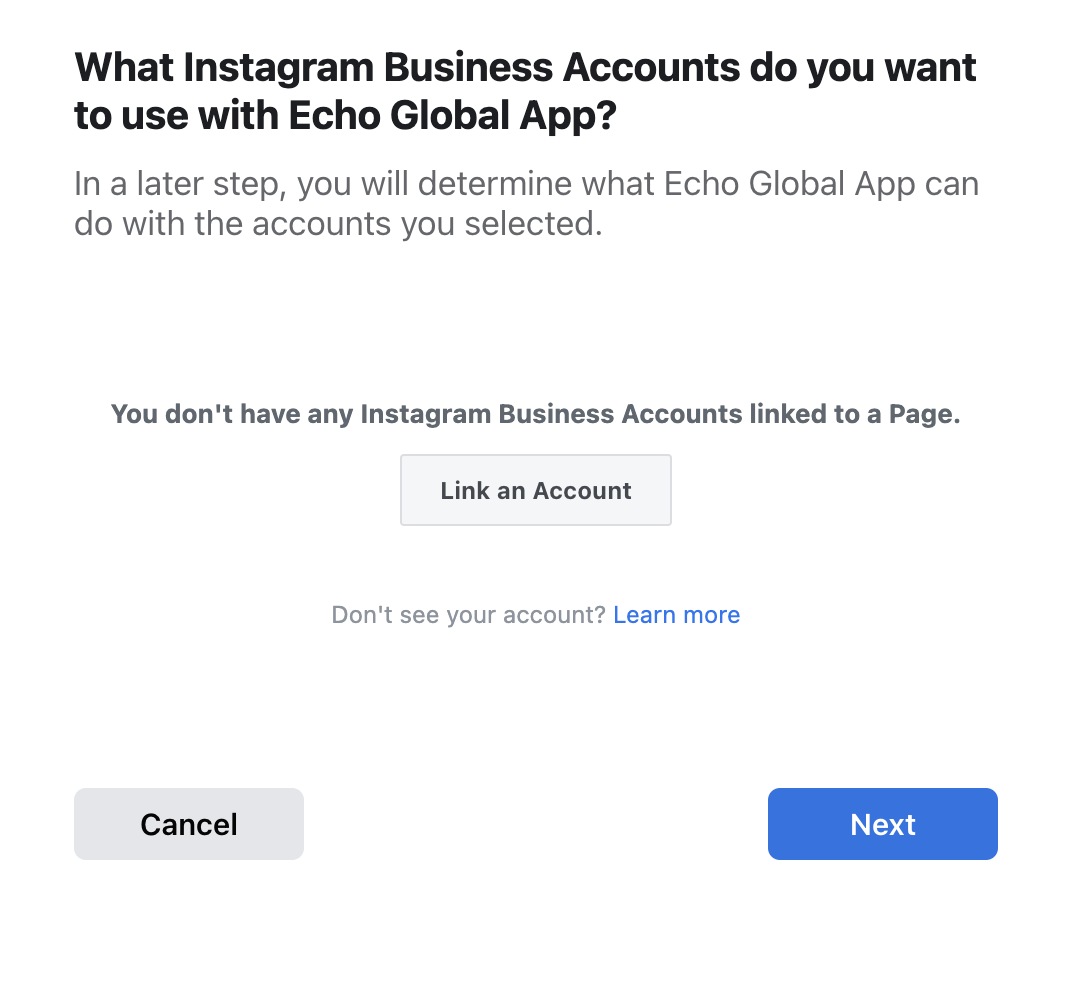
The first page is asking what Instagram account you want to connect. If you do not have an Instagram account connected to your Facebook page, or you don’t want to add your Instagram account, you can click Next.
The next step will ask you which of the Facebook pages you administer do you want to add to Echo.
You can add more than one Facebook page at a time if desired. Just keep the ones you want to add checked.
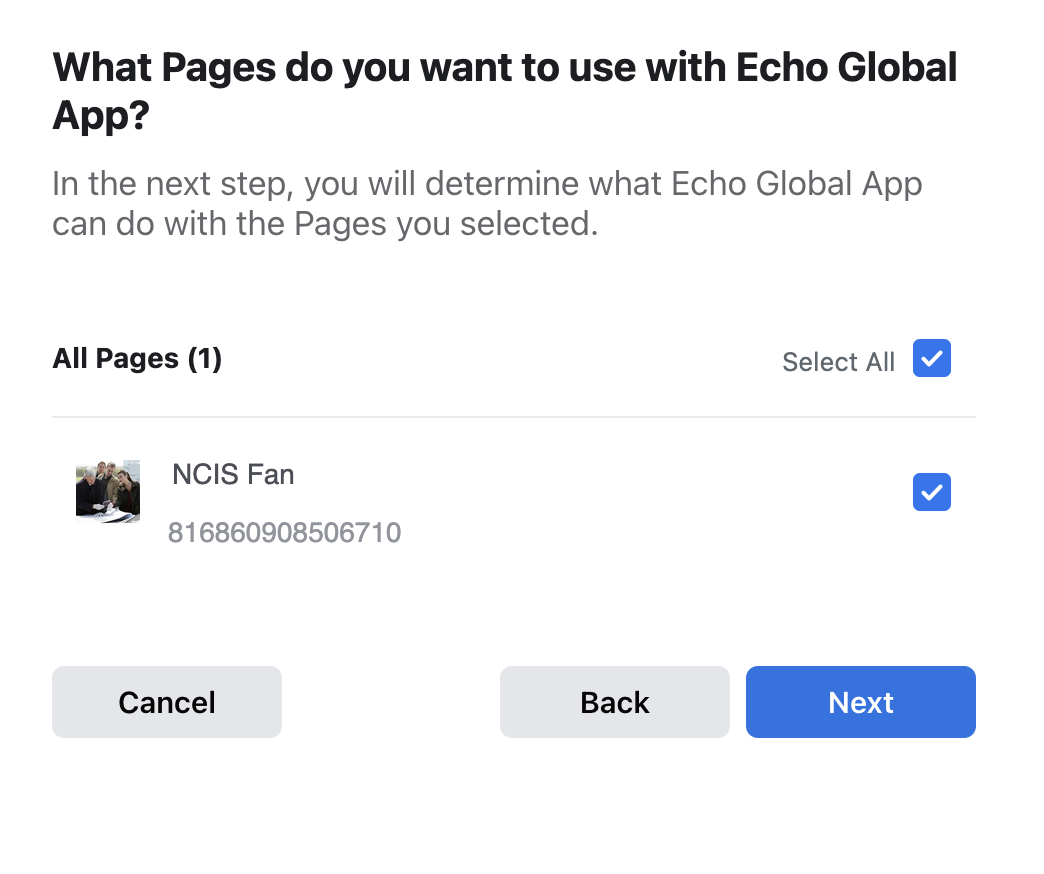
Click Next
The next step will display a series of settings for which you need to allow Echo access. Notice the message at the top that says “The Echo Global App may not work properly if you turn off these options.” It is recommended that you leave on all of the options that are toggled to Yes.

Click Done
You should get a confirmation message like this:

Click OK
Now that you are back in the Echo Integrations area, you will see the Facebook page(s) you just connected under Available Facebook Page.
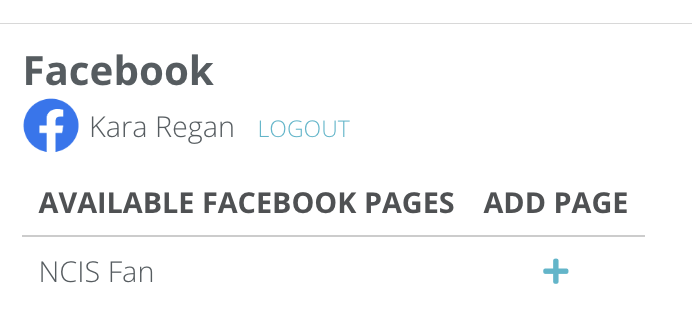
As a final step, click the + under Add Page for the page(s) you want to finish connecting.
Your page will now show under the Facebook Pages category.

Your page is now connected, and Echo will begin receiving new comments and messages sent to your page.
The last step is to add the page to an Echo Permission Set to provide the conversation access to the group of Echo users you wish to respond to your Facebook messages and comments.
Explanation of additional settings:
Settings - Click on the setting icon next to the Facebook page:

Facebook Ad Management - If you add your Ad account ID, it gives you access to all comments that come in via ads. IE, if you boost a post and you don't have an ad account ID associated with your facebook integration, Facebook will not allow Echo to access those comments and pull them in.
To add your Ad Account ID, first you will need to find the Ad Account ID number. Click on the Facebook Ads Management link, and under Account Overview, look for the number listed.
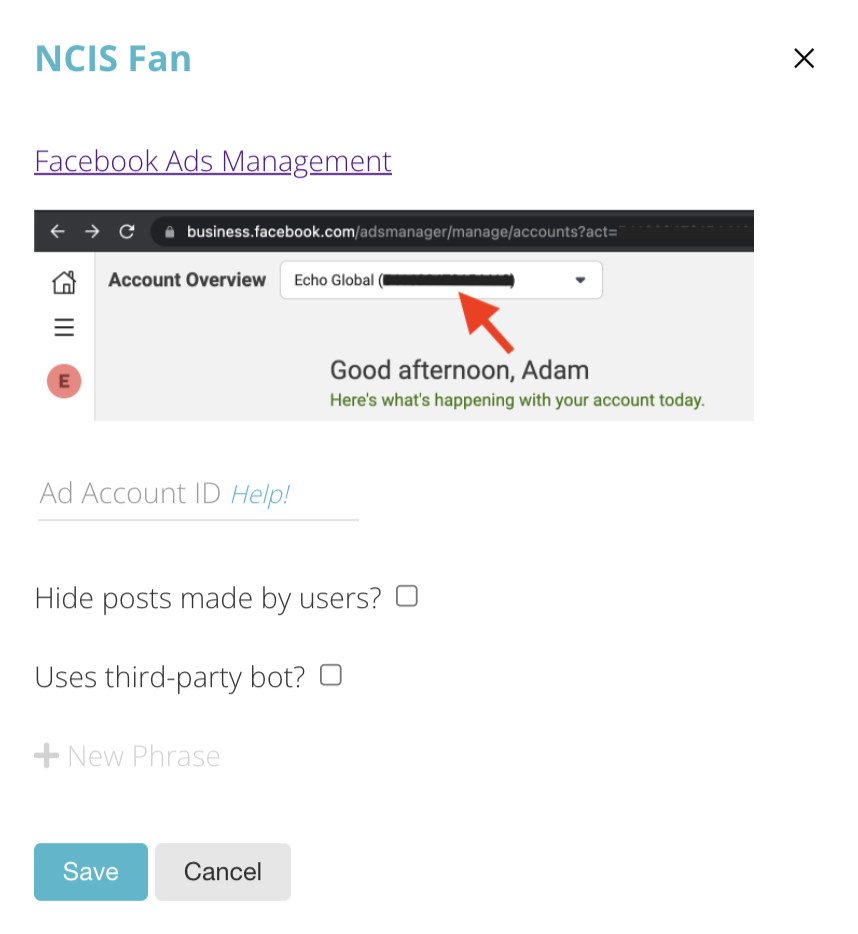
Now place that number in the Add Account ID field in Echo Settings.
Once you have added your Ad Account ID and close the settings box, the $ for the Facebook page under “Ads” will turn from gray to blue.

Hide posts made by users - [Info Coming Soon]
Use third-party bot - [this setting as is will be deprecated soon] - Instead, if you want to use a third-party bot, you'll need to do all of the setup between the third party bot and Facebook handover protocol. Once set up, make Echo the secondary handler in the Facebook handover protocol setup and the bot primary. Now, Echo will not be involved at all until Facebook decides it is time to push the conversation over to Echo based on your handover settings.
Ads - If this icon is gray, you do not have an Ad Account ID set up for this page. If the icon is blue, this page is set up with an Ad Account ID.
Status - A blue checkmark means your status is good. A red X means there is something wrong with your page status and you may need to refresh the page or re-add the page.
Added By - The Echo User that added this Facebook page to Echo.
Link - Clicking on this will take you to the Facebook page.
Add Instagram - If you didn’t connect the Instagram account associated with this Facebook page when you first added it, you can complete those steps at any time by clicking the + for the page under add Instagram.
Refresh - If you need to refresh the page status, you can click on the refresh icon. If this doesn’t solve your status issue, you may need to delete the page and go through the steps of adding the page as new.
Delete - Delete the Facebook page integration.