CRM: User Documentation

About:
CRM or Client Relationship Management is where your client information is stored in Echo. Any clients who enter Echo through a conversation contact will have their information stored in the CRM. Their records can be updated as you learn more about them. Echo’s CRM also allows you to create new client contacts that you form outside of Echo so that you have one place to store your client information.
Menu Definitions:
Clients - Clients are the people who have entered your system through your various conversation sources or by direct input from your team.
Blocked Clients - People who have entered your system who have been blocked by one of your users or an administrator.

Subscribers - Subscribers are people who have entered your system through the Auto-responder keyword campaign process. Since they haven’t initiated a conversation with you, they are in this separate list, rather than in the clients area. However, if they do reach out in conversation with you, their details will be added to the client record area.
Audiences - Designed to be used with Auto-Responders, Audiences are clients you can group together for the purpose of sending a specific message to this group of clients.
Clients:
Searching Clients

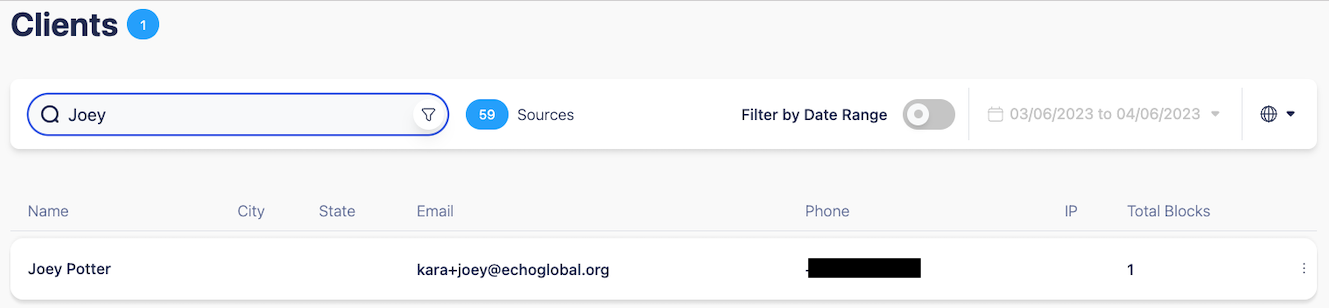
The default search when you enter the clients area is for new clients in the past 30 days. To find the person you are looking for, you can use the search field, add specific sources, and/or update the date range.
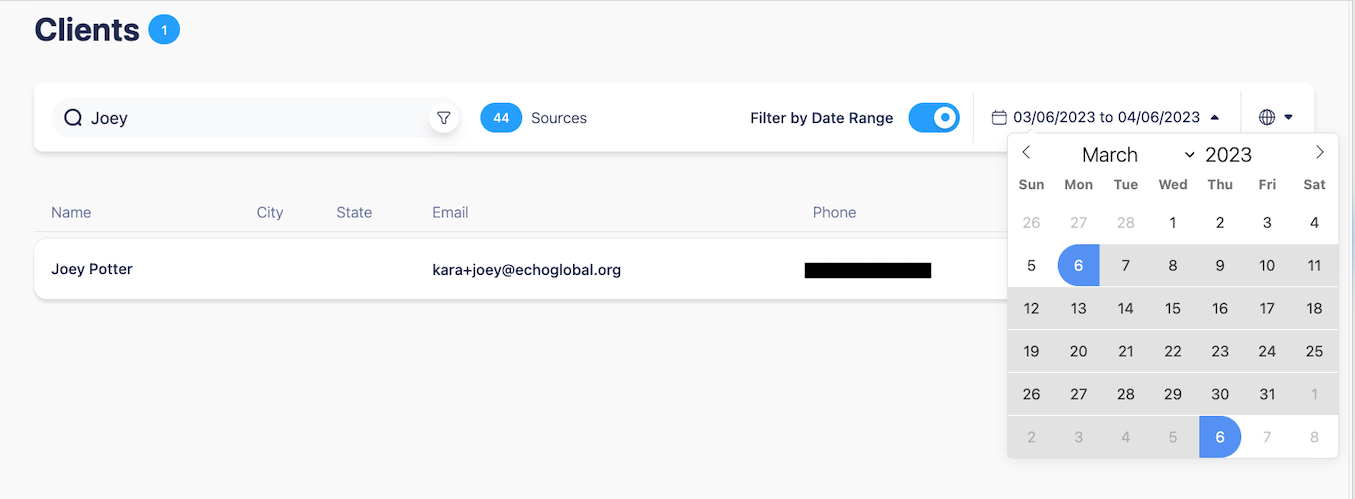
If you want to search all existing clients in your system regardless of date range, click on the Toggle next to "Filter by Date Range". It will change from blue to grey and will gray out the date range selection. The CRM will now load client results without considering the date range (source selection still applies).


Sources:
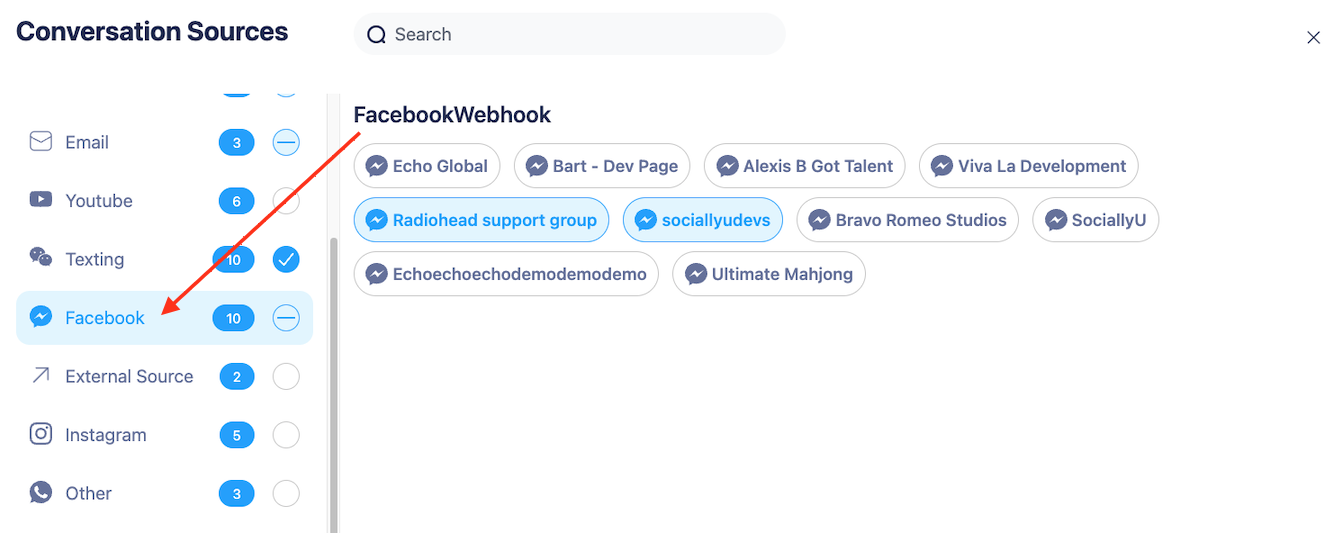
The source selection defaults to all sources selected, to change this, click on the word "Sources" which will open the sources box. You can deselect all sources by clicking the blue circle next to the "All category". Likewise, you can select all sources by clicking the same circle.
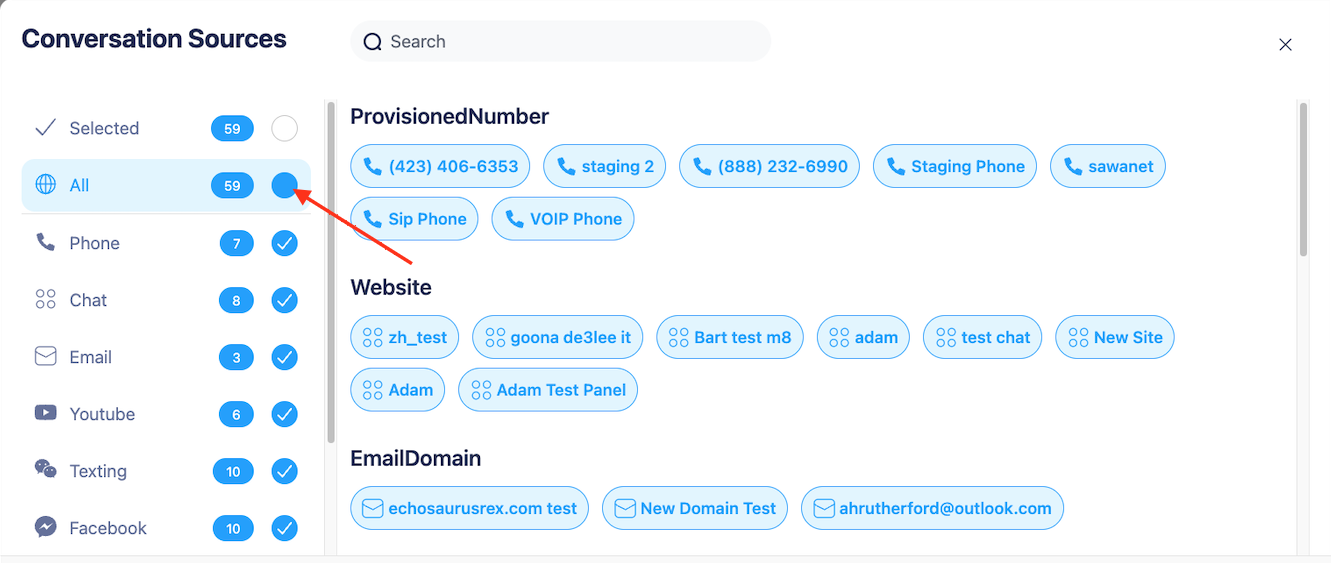
Source Options - When all of the sources in a category are selected, the circle will be blue with a checkmark. When some of the sources in a category are selected, the circle will be light blue with a horizontal line. When no sources in a category are selected, the circle will be white.

To see all of the selected sources displayed, click on "Selected".
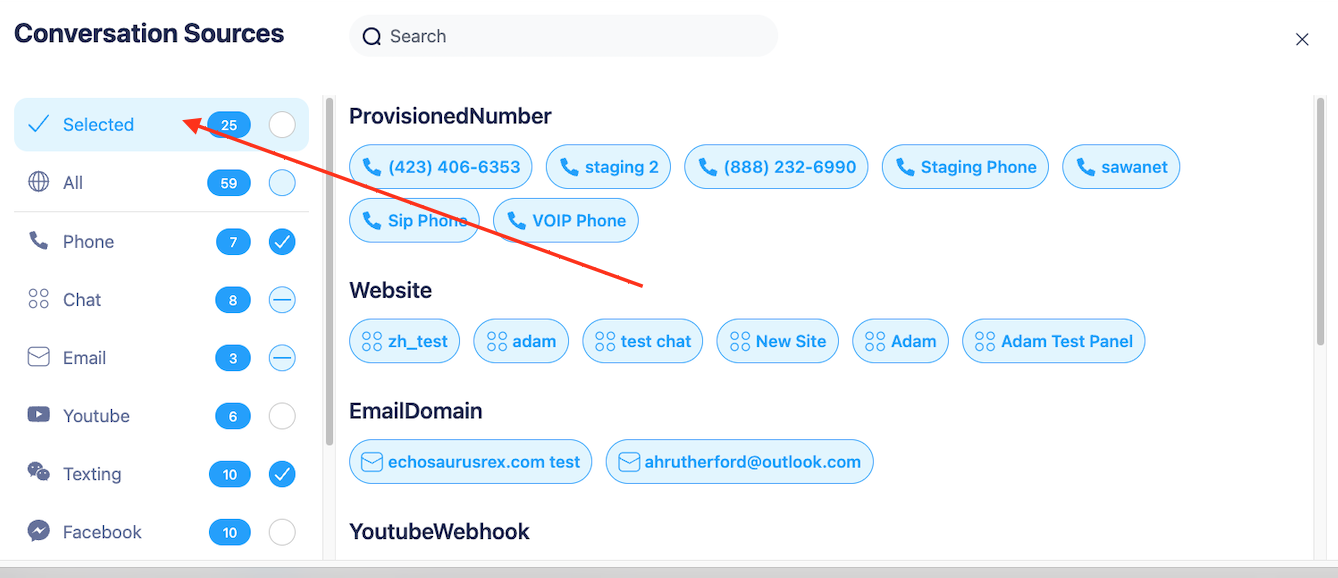
To see just a specific category of sources displayed, click on the category name.
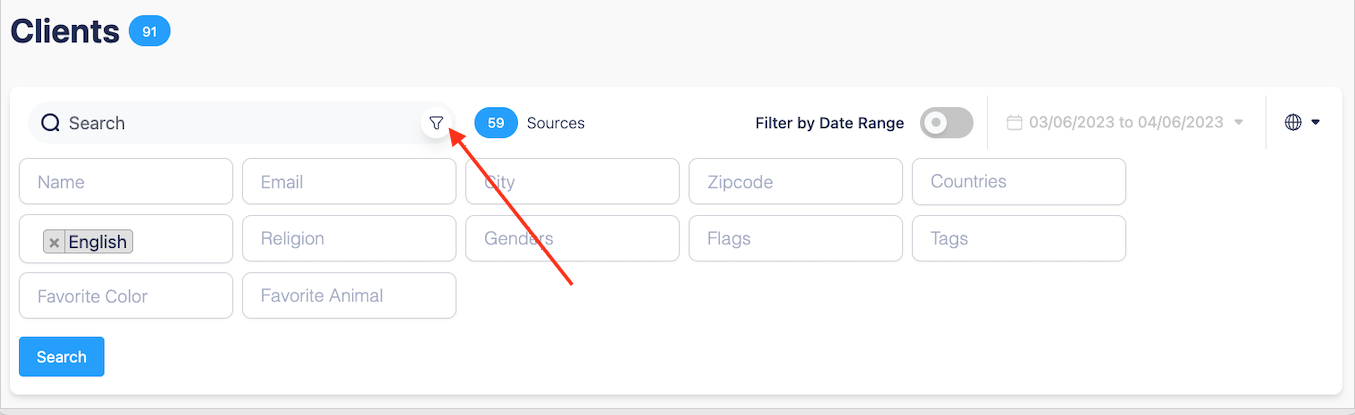
Search Fields:
The search box allows for name, email, or phone number search.
For additional search field options, click the funnel icon next to the search box. This will open up the rest of the advanced search options.
Viewing Clients
Once you’ve found the client you want to view, click on their name to show basic details and conversation history.
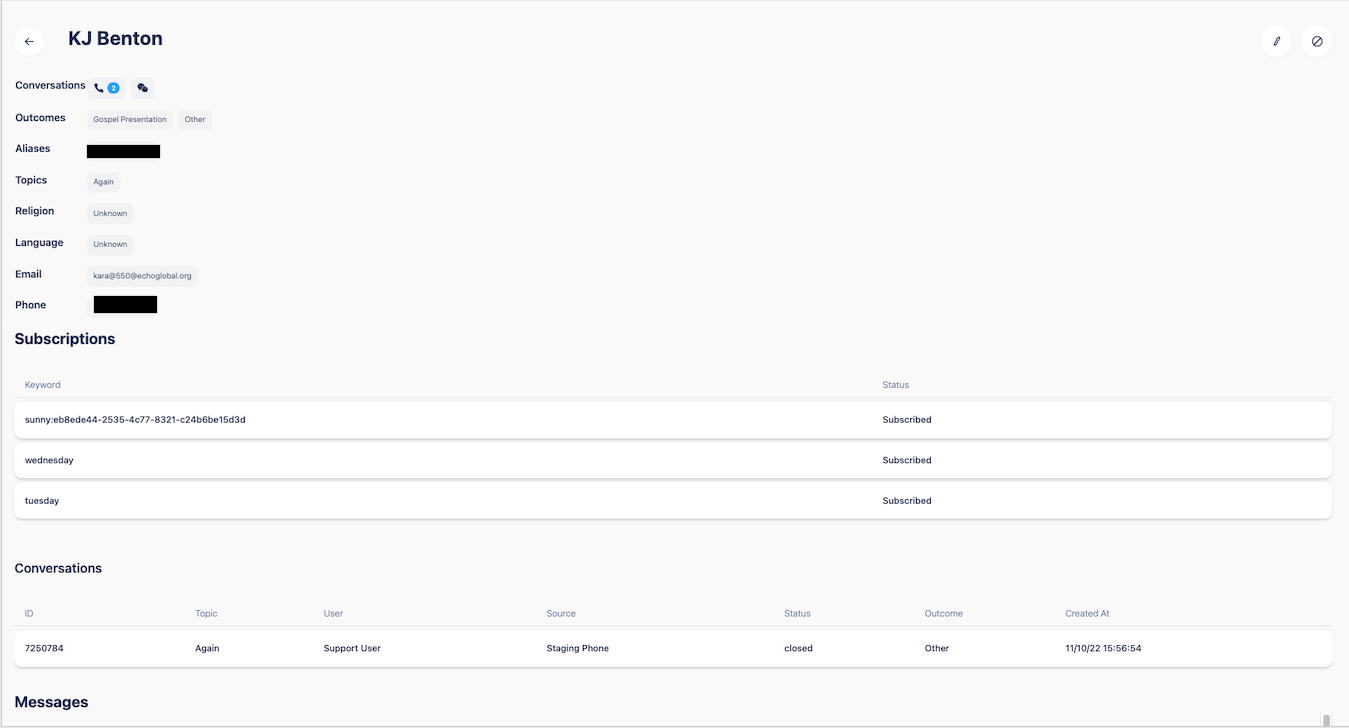
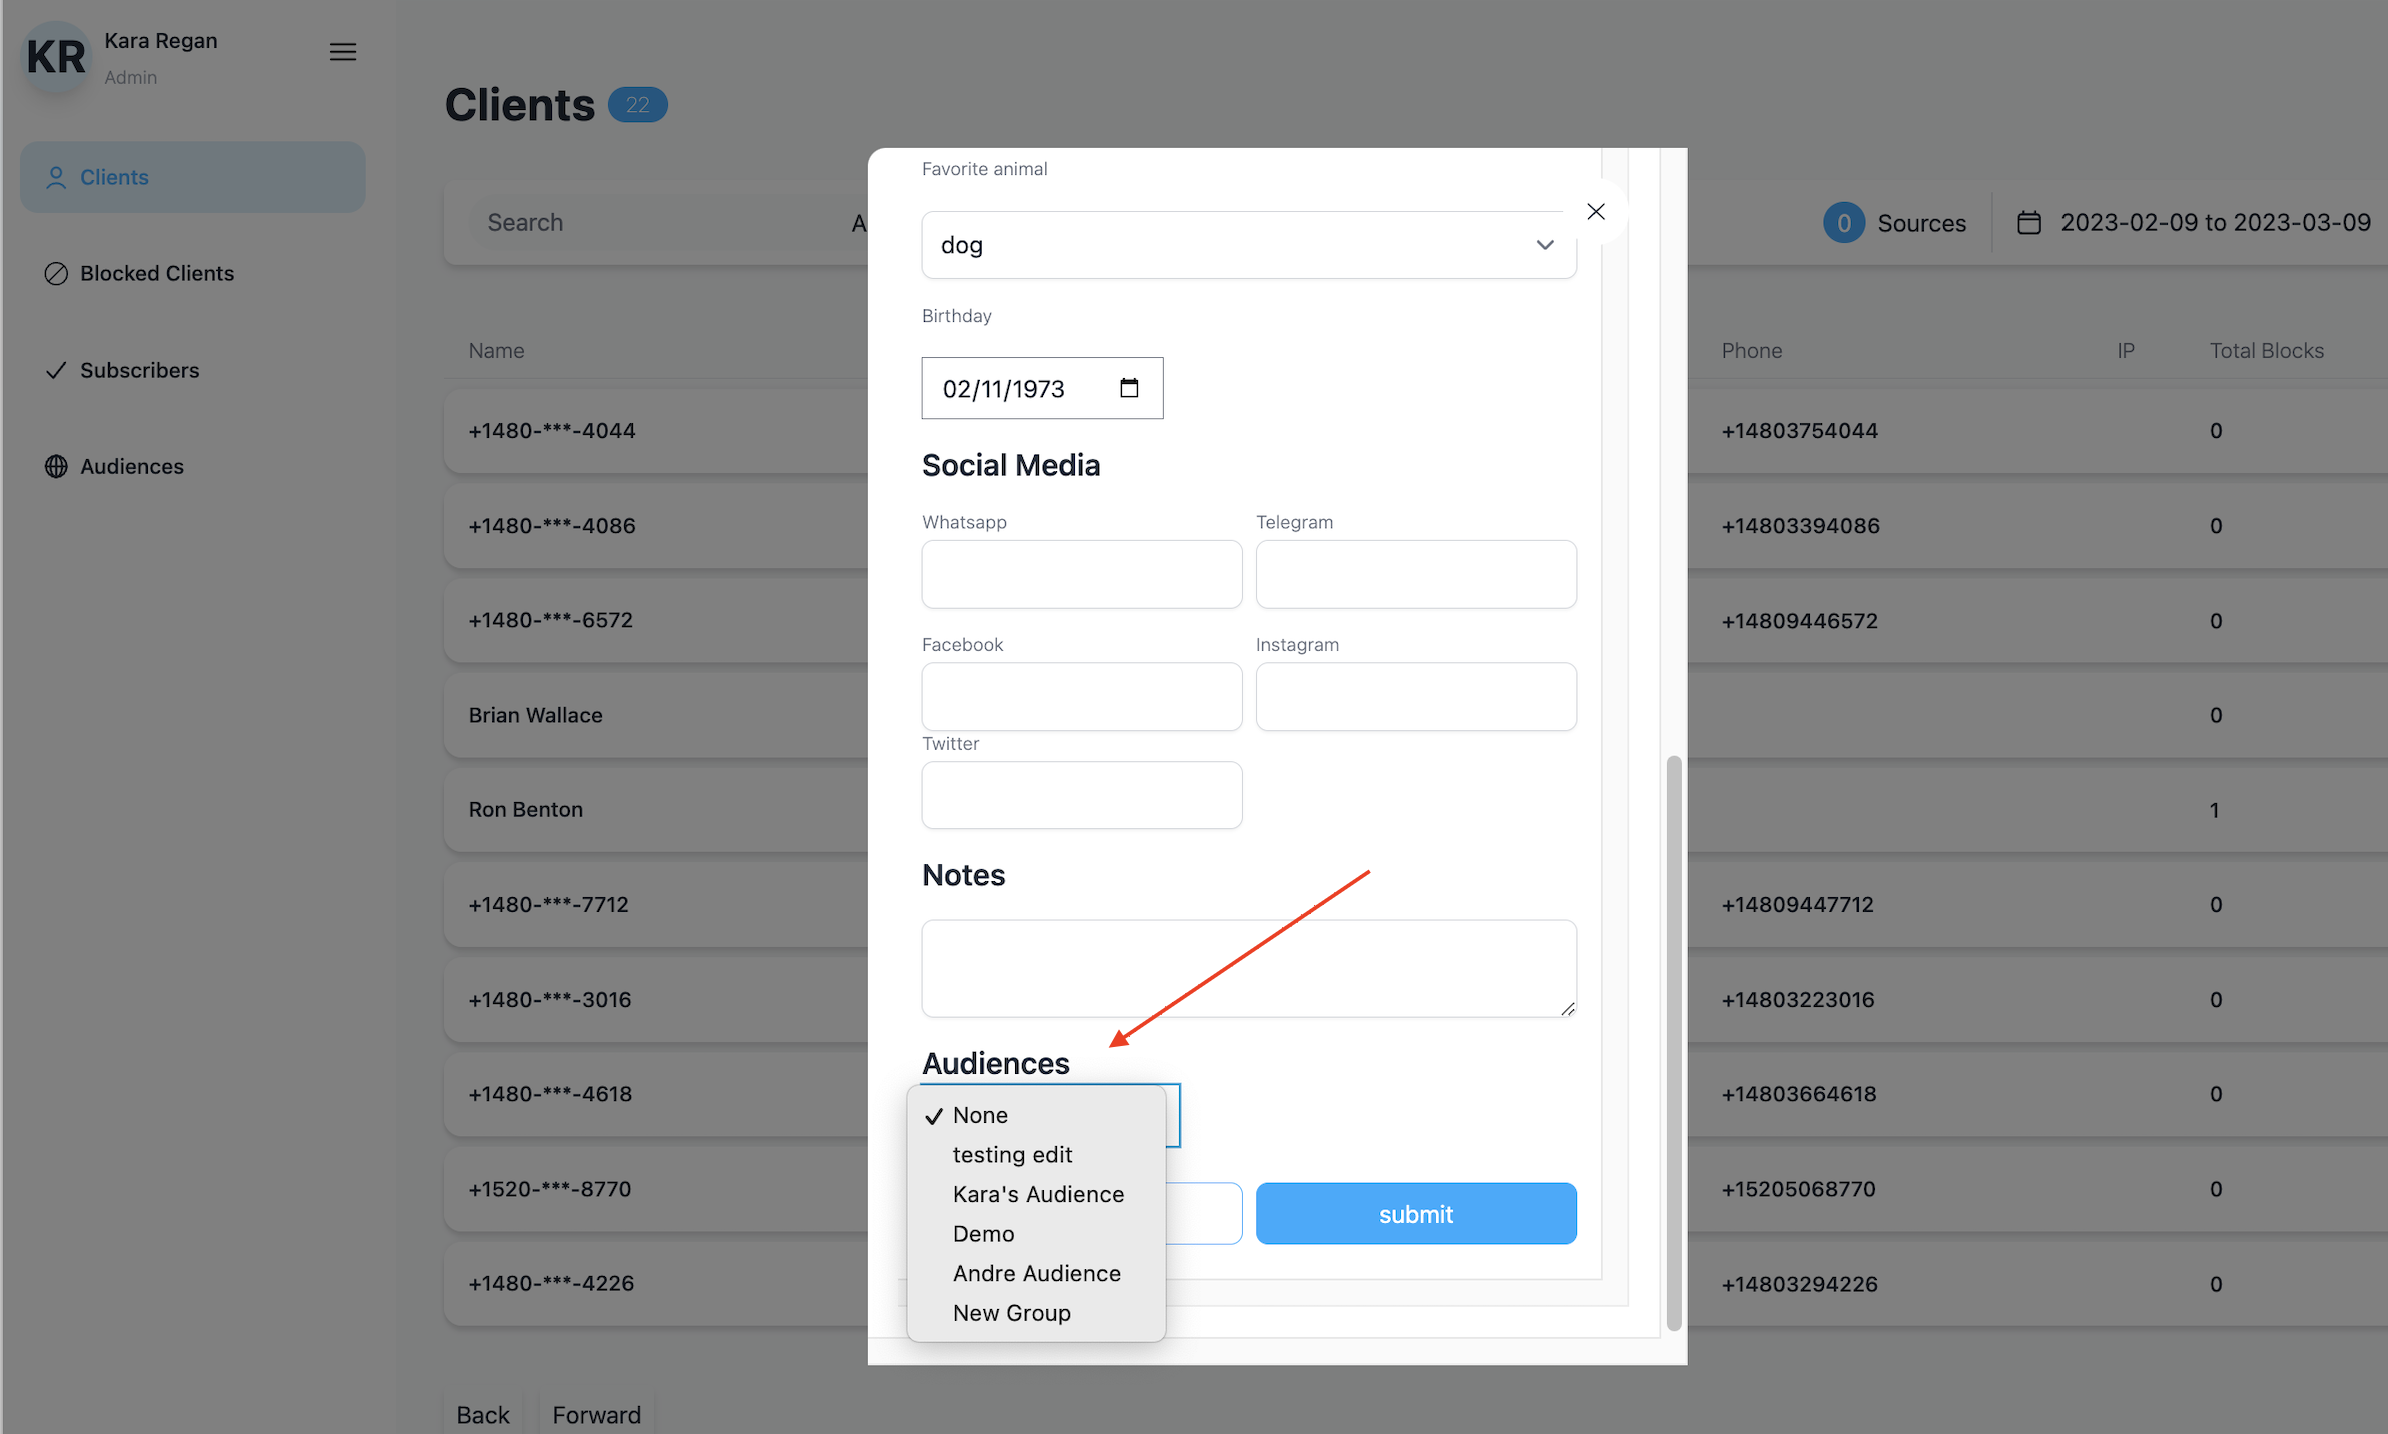
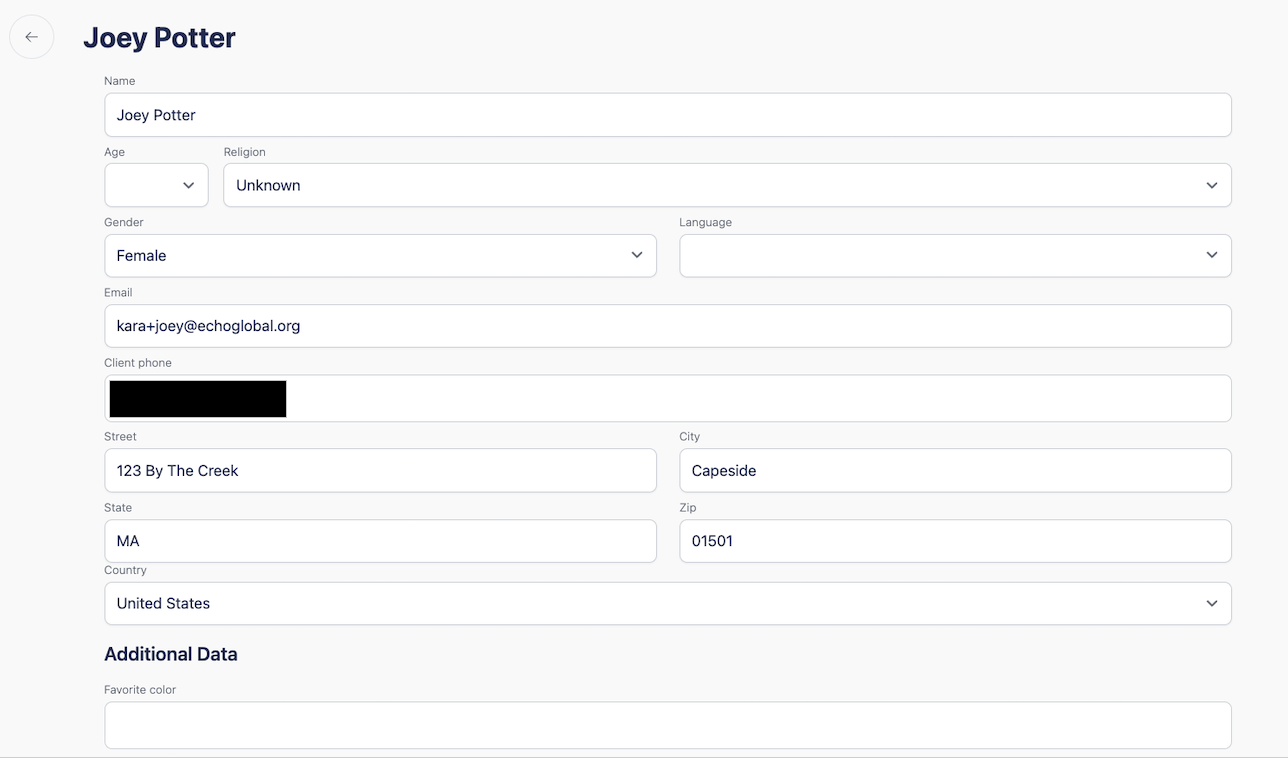
If you want to see additional details about the client, click on “edit”.
Editing Client Details
To edit a client record, click on the 3 dots at the end of the row for the client you want to edit.

This will open an actions box, click on “edit”.

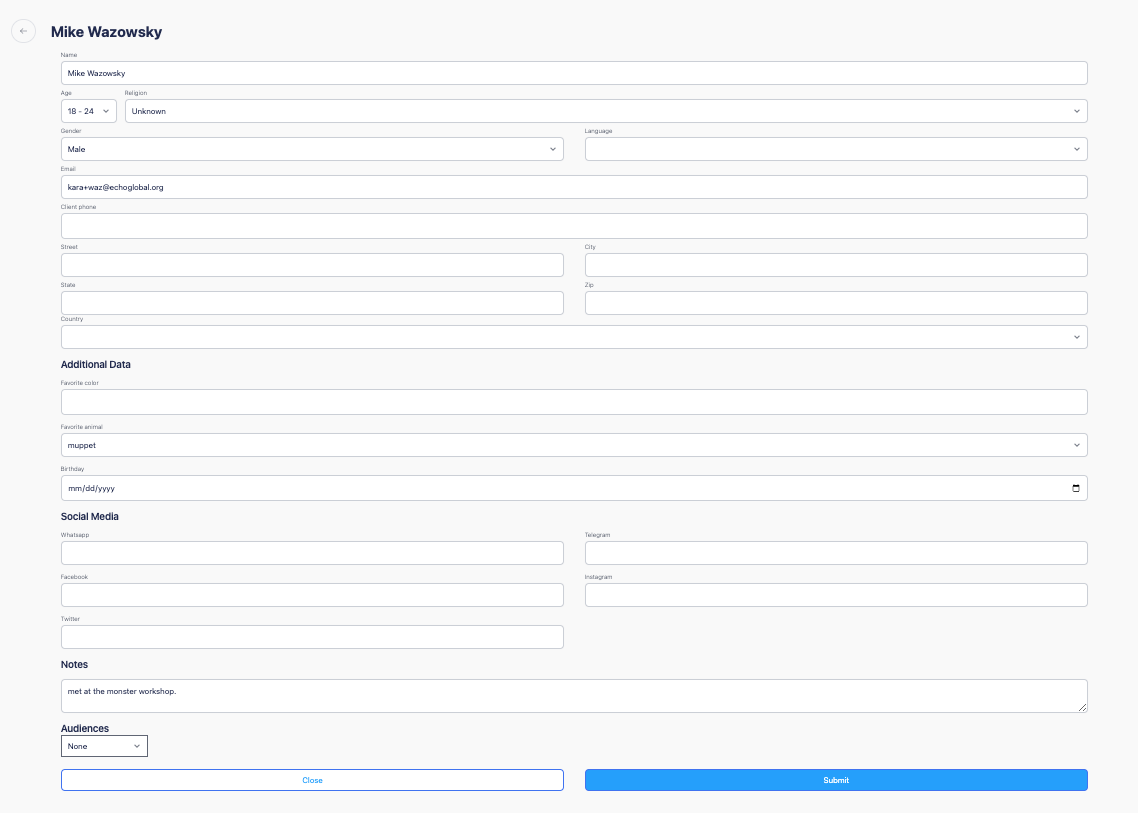
This will open the client details, which you can update and then click the “submit” button at the bottom of the form.
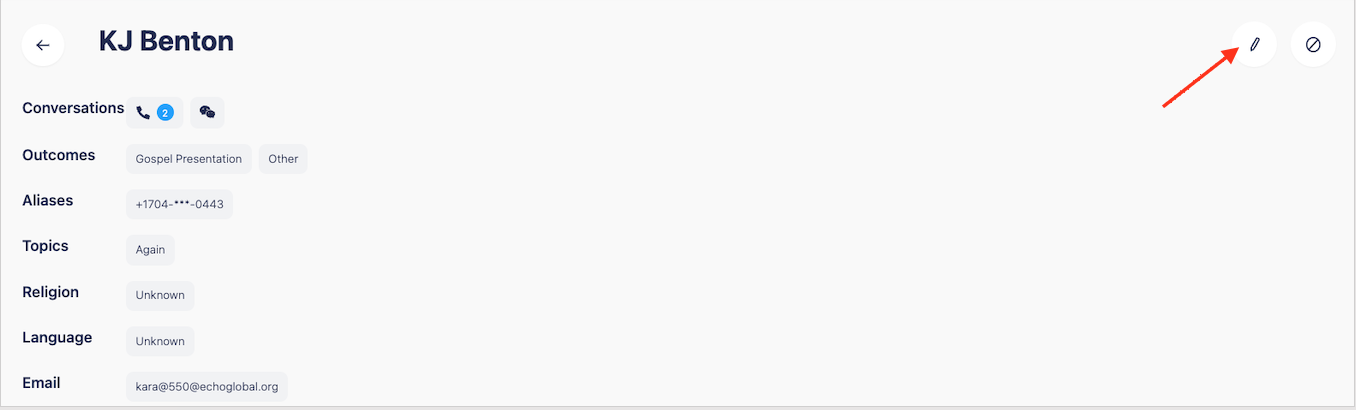
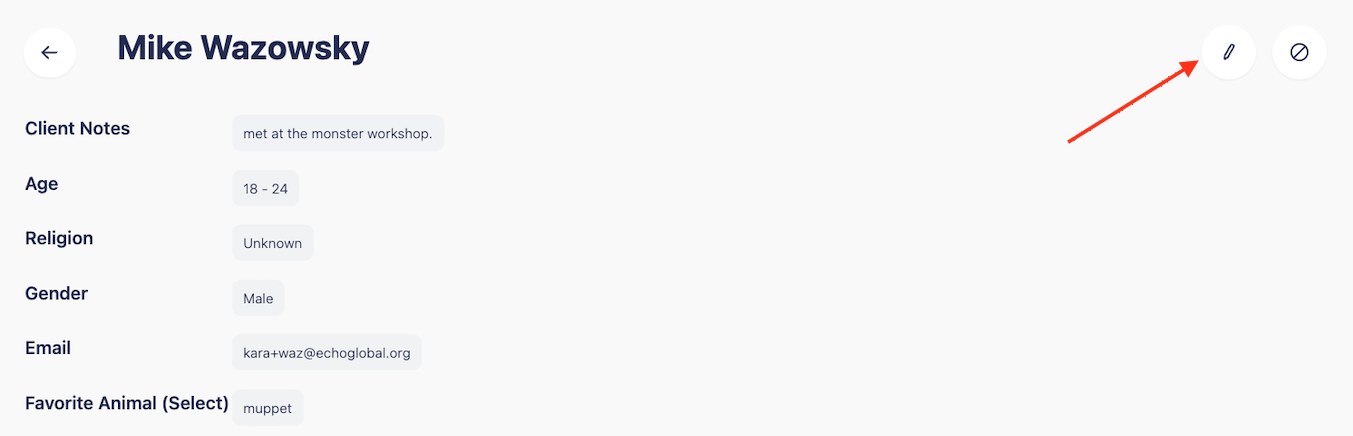
An alternative way to edit the client details, is to click on the client’s name.

Which will display the information about the client, and provide an action button at the top. Click on the “edit” button. This will bring you to the same edit client details box where you can update the information and click “submit” to save.
Adding New Clients
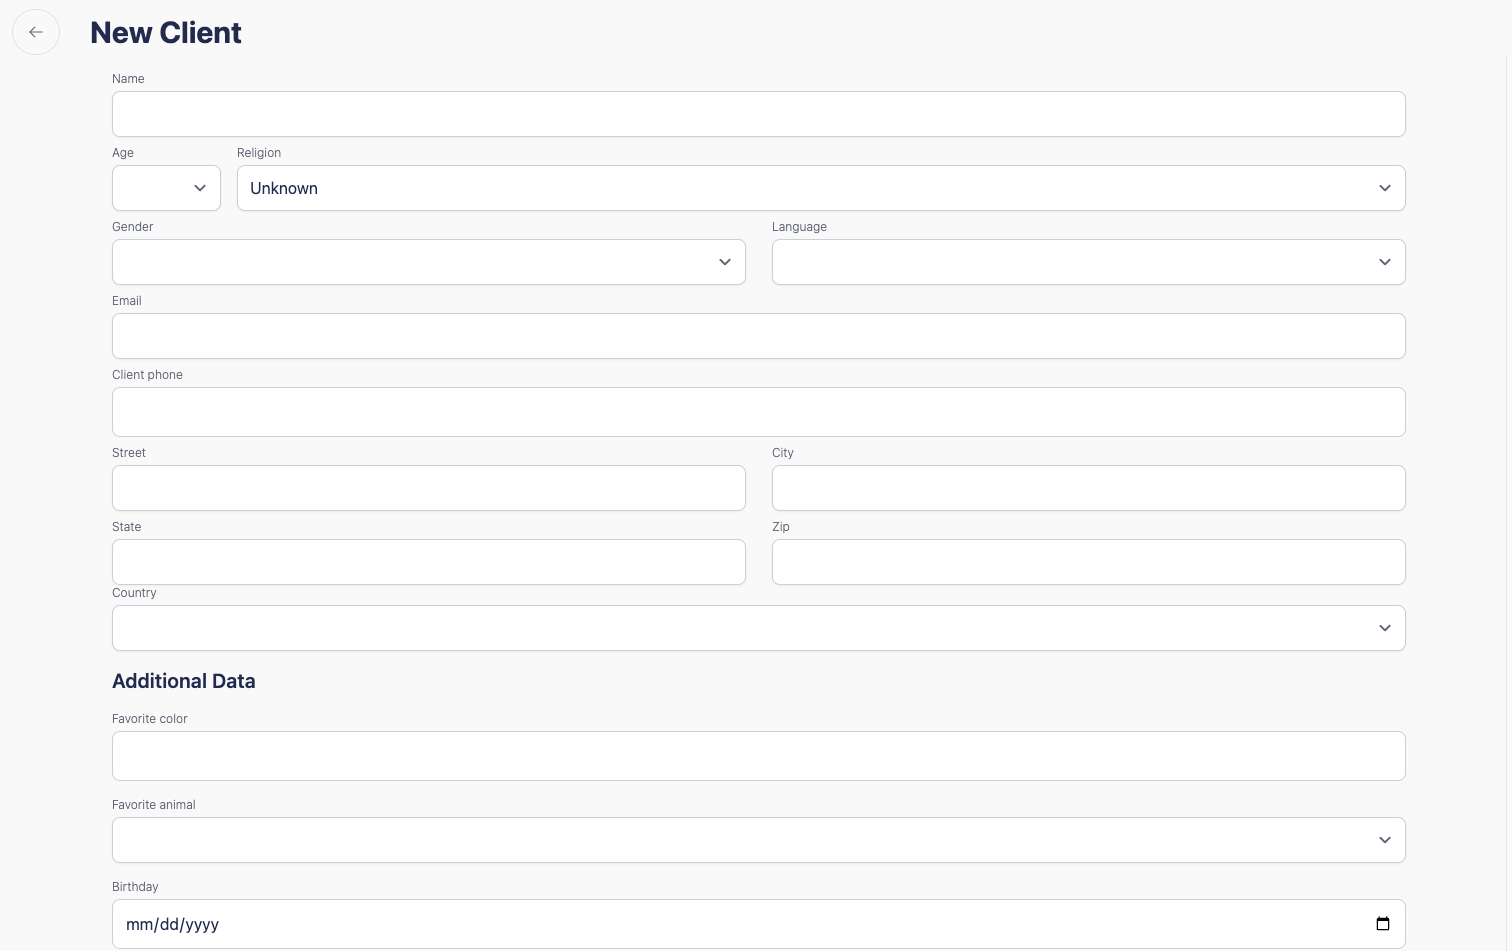
To add a new client into the Echo CRM, select “clients” and then click on the + in the bottom right corner.

In the form, add any data you have about the client, and then click the Submit button.
Because you are adding your client manually, you will need to change your date selection to include the current day so that your new client will display, or have it set to not filter by date range.

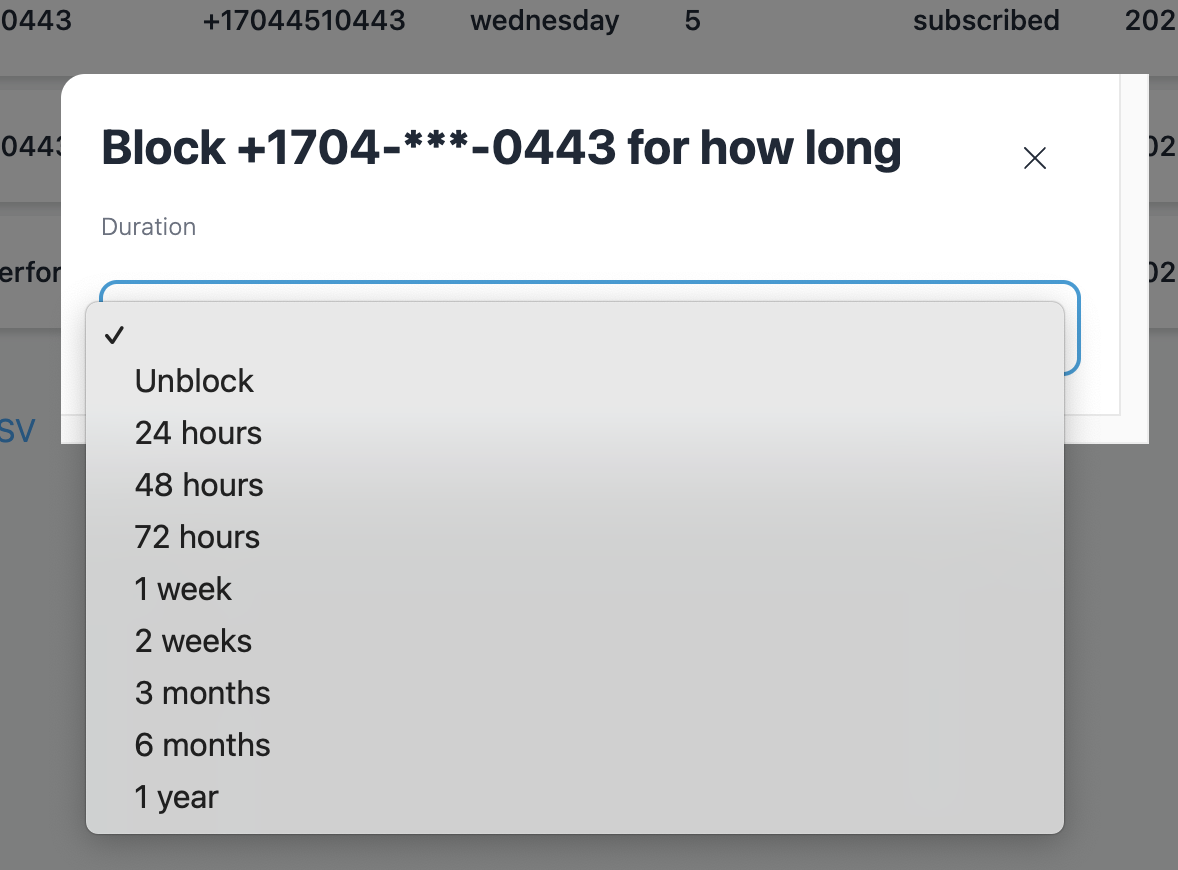
Blocking a Client
While a user can block a client for 24 hours from an active conversation, blocking in the CRM gives you more options for how long a client can be blocked for. This is also where you can extend a block or remove a block on a client.
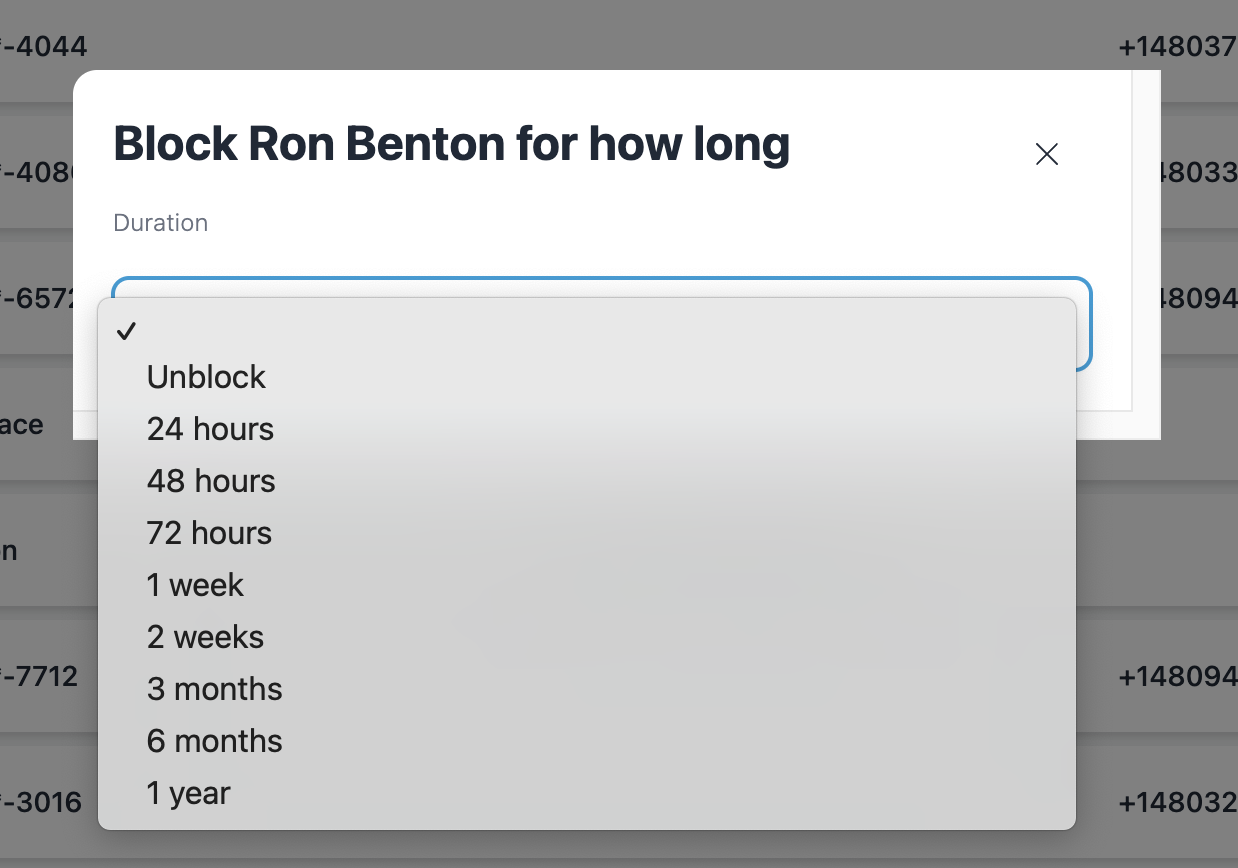
Click on the 3 dots at the end of the row for the client you want to block, then click "block user".
Select how long you would like to block the user for, then click the X to close the box.
There will be additional options for an existing blocked client, see below.
Starting a Conversation
For some clients, you are able to start an outbound conversation from the CRM without having to wait for the client to send a message into Echo. This is dependent on the information you have for the client and which conversation types allow initiating outbound conversations (No Social Media sources allow initiation of outbound conversations. This is a restriction from the social media platforms and not from Echo). The most common ways you can initiate an outbound conversation is Email, SMS, or Phone Call.
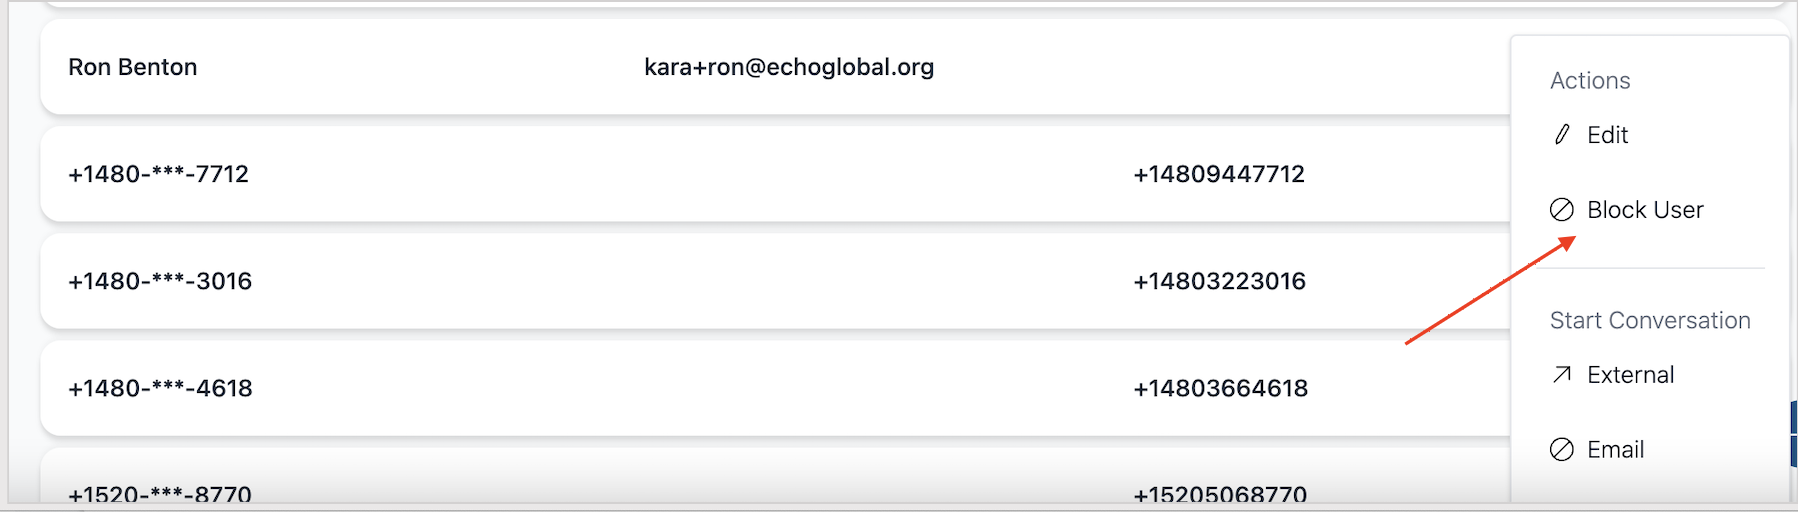
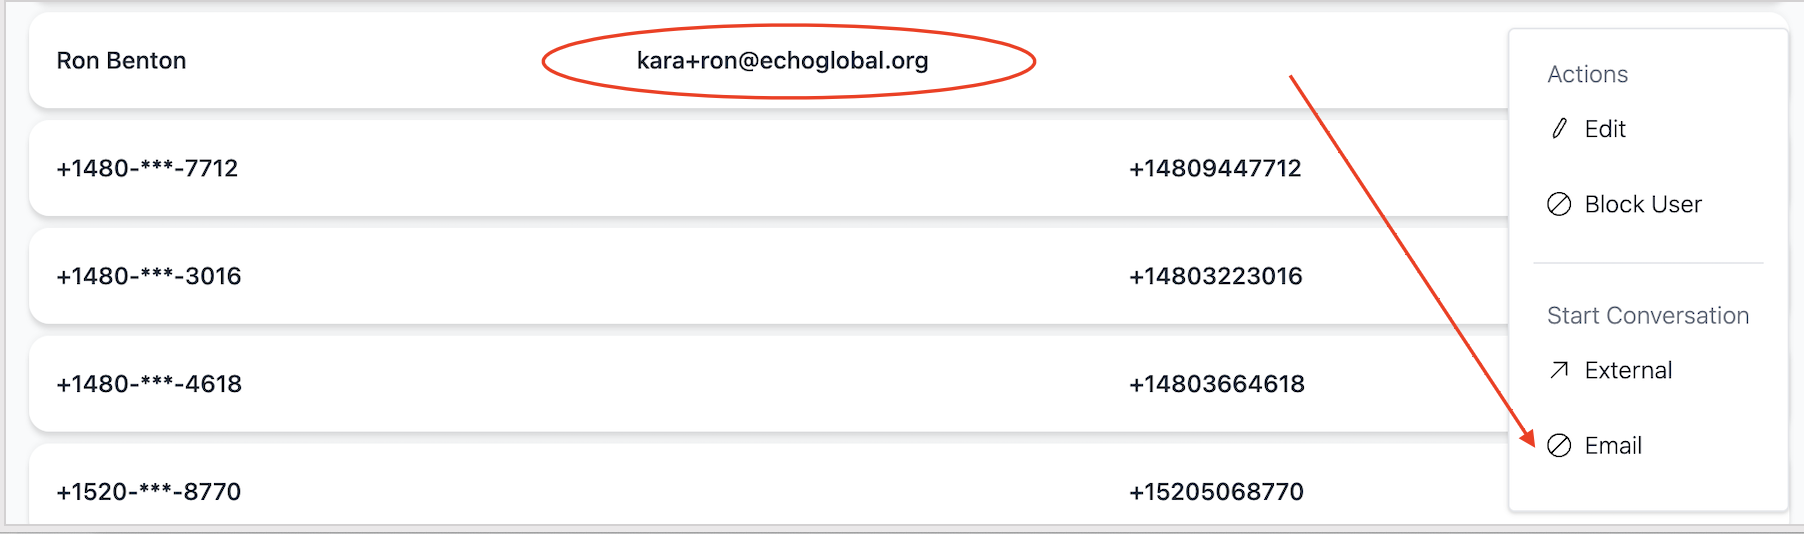
Click on the 3 dots at the end of the row for the client you want to initiate a conversation with. The start conversation options you see will be what is available for the client.
In this example, because I have the email address for client Ron Benton, I can start an email conversation with him.
In this example, I have the email address and phone number for client Jimmy Corn, so I can start a text, email, or call with him.
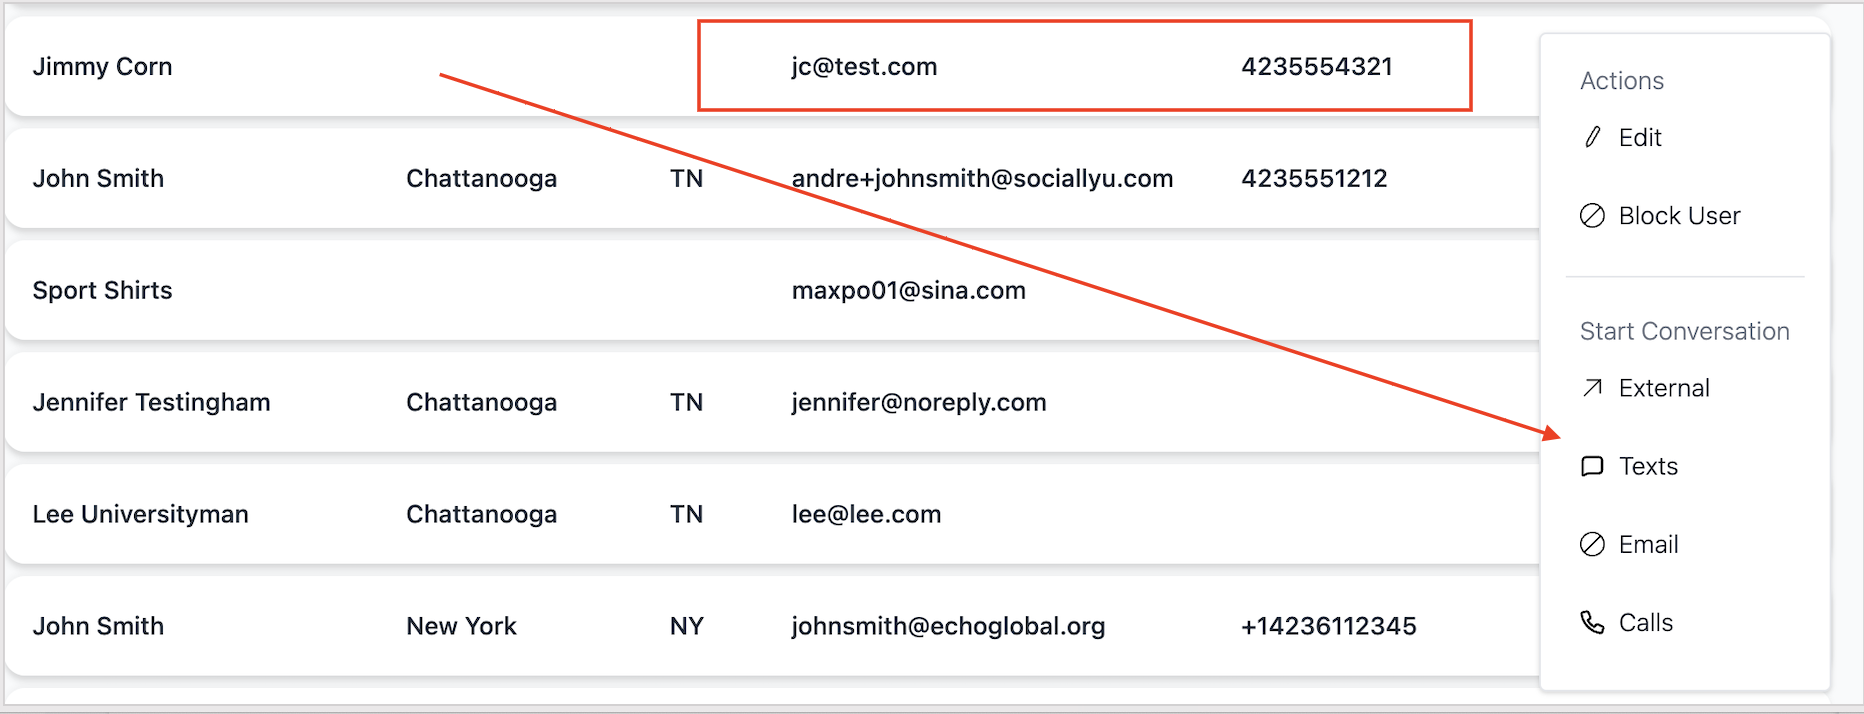
External Conversation
For each client, you will see that you can start an external conversation with them. This lets you record a meeting you may have had with a client outside of Echo.
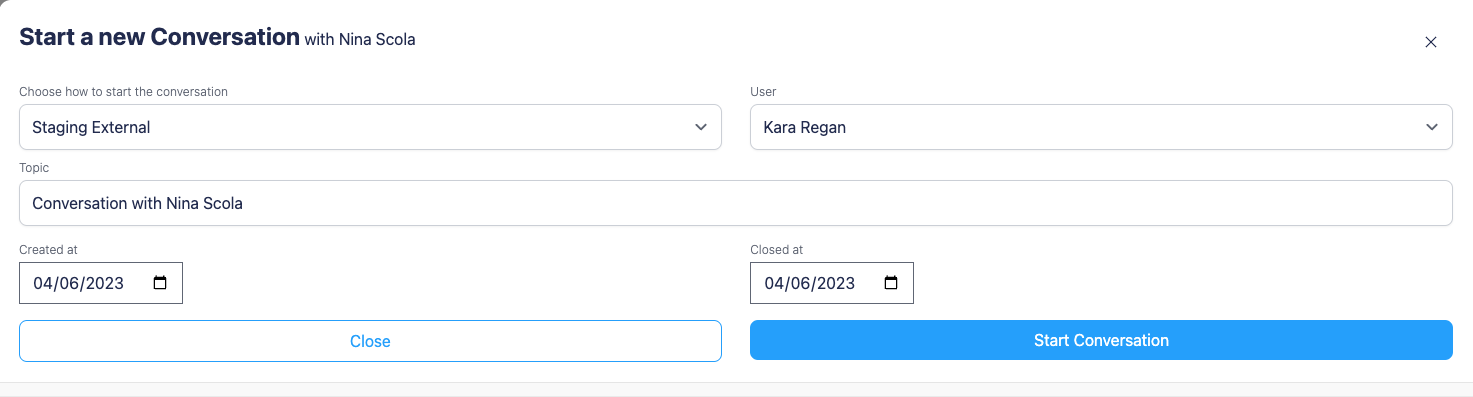
Click on "external" from the start conversation action. You will then be able to choose from the list of external source options you've created in the admin area of Echo. Assign the communication with a user. Provide a topic and when the communication took place. Once you click "submit", you will have the option to provide an outcome and notes for the communication. This is now stored with the conversation history of the client.
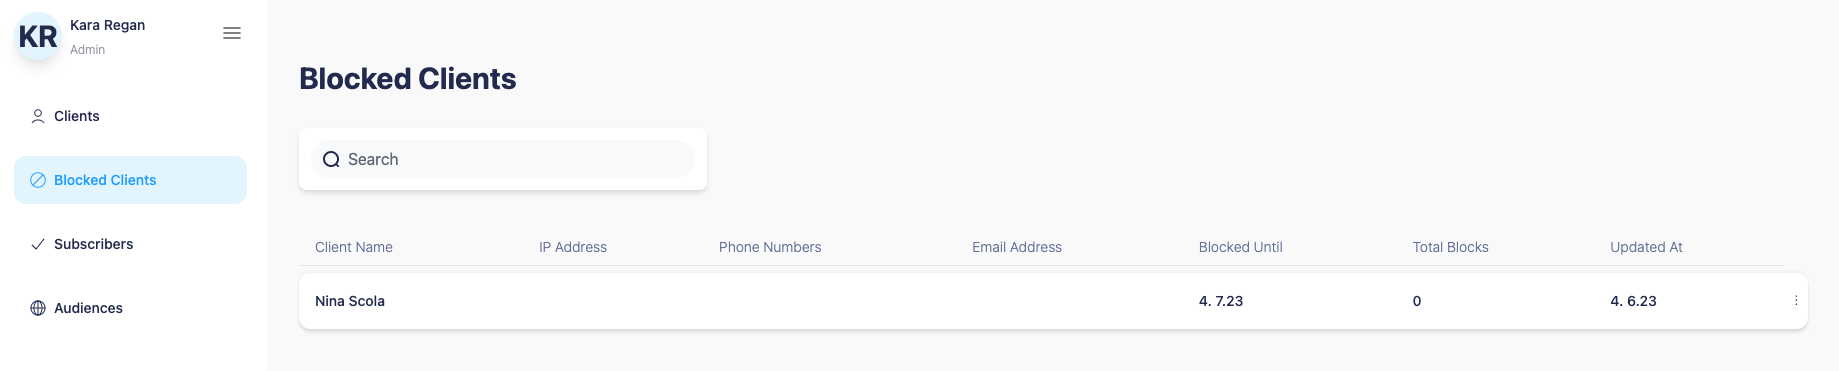
Blocked Clients:
The Blocked Clients menu in CRM is where you can find information details for clients who have been blocked in your system.
On the initial screen, you will see the client’s name, how long the client is blocked until, and the total number of blocks for this client. If Echo has the information, it will also provide the client’s IP Address, Phone Number, and Email Address.
Editing Blocked Clients
If you would like to remove the block (unblock) or extend the block duration, you can do this here. Click on the 3 dots at the end of line item for the client you want to update, and select the appropriate option.

Subscribers:
SMS Keyword Subscribers do not enter the CRM in the same way a client who initiated a conversation does. Because of this, CRM has a separate area to display your keyword subscriber clients.
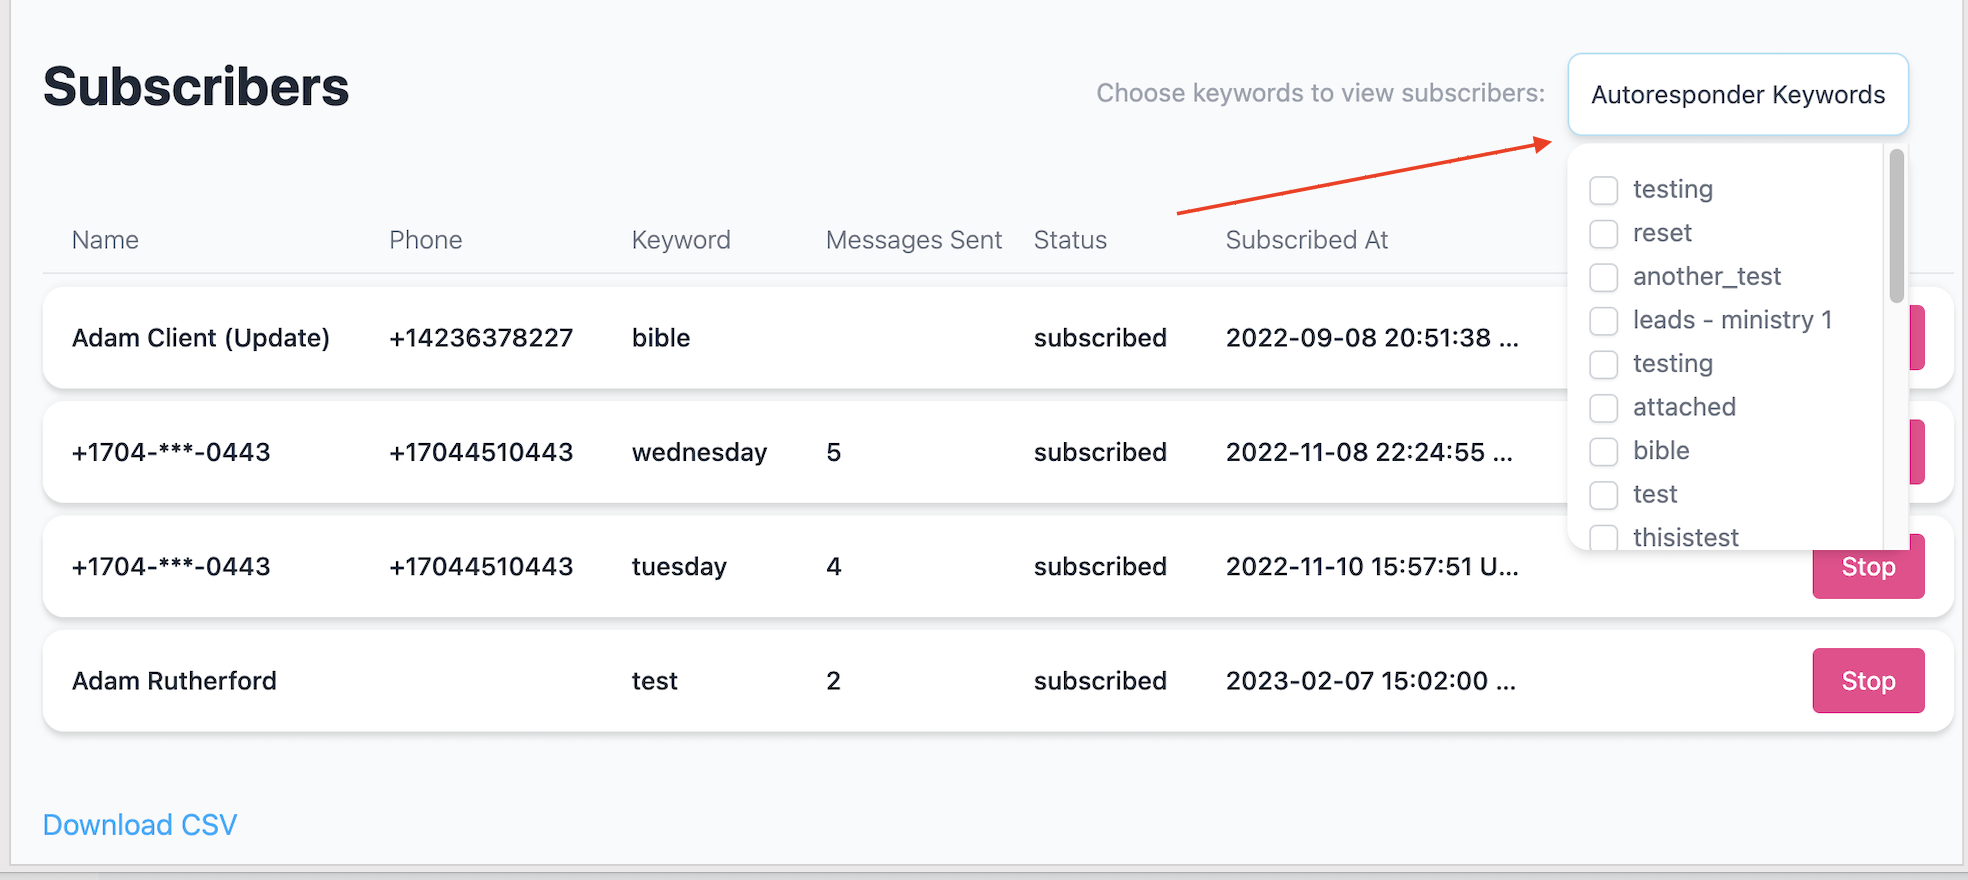
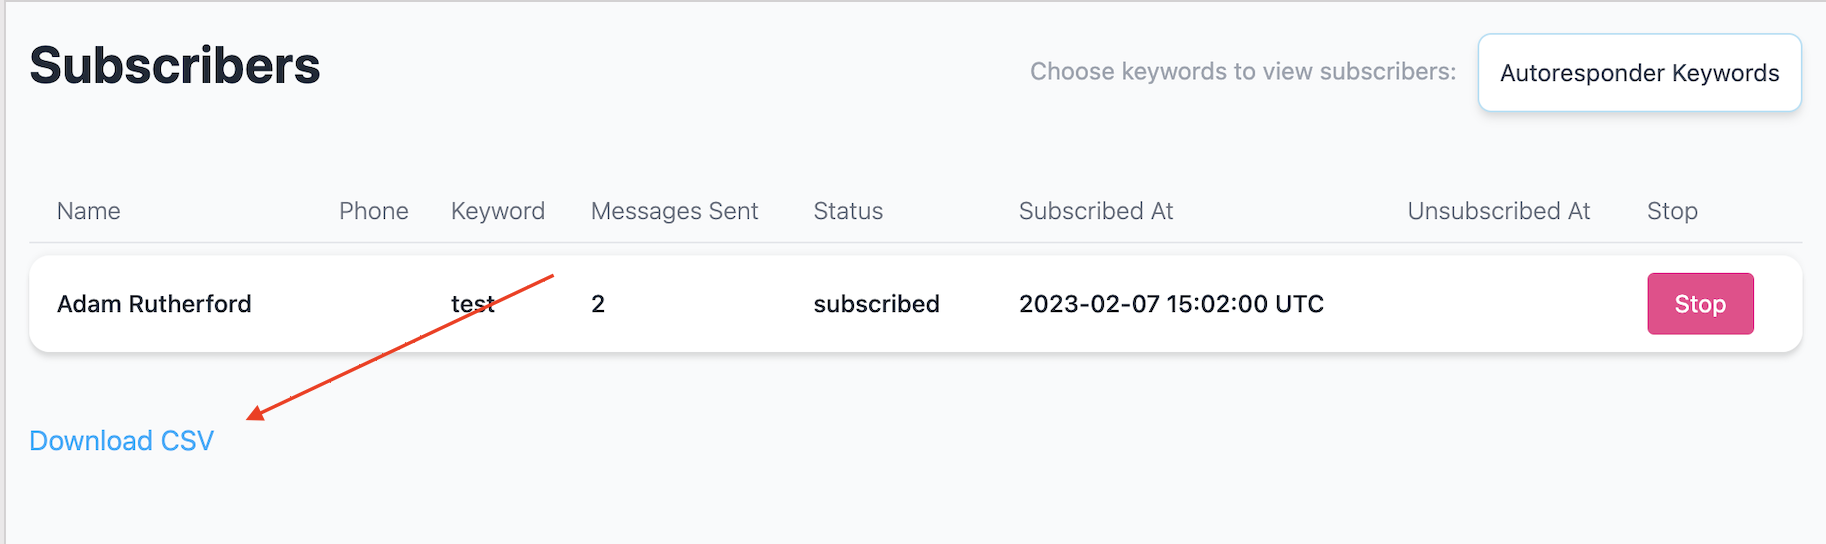
The subscribers area will show you the following client information about your keyword subscribers: Name, Phone Number, The keyword(s) in which the client is subscribed, How many messages sent, their current subscription status, the date and time the client subscribed, and the date and time the client unsubscribed (if applicable).

If you want to search for subscribers by a specific keyword, select the "Autoresponder Keywords" box in the upper right corner. This will provide a drop down box to select the keyword.
If you'd like to download the list of subscribers in your search results, click on the "Download CSV" option at the bottom of the list.
Additional Details
There are two areas you can click on to see additional information.

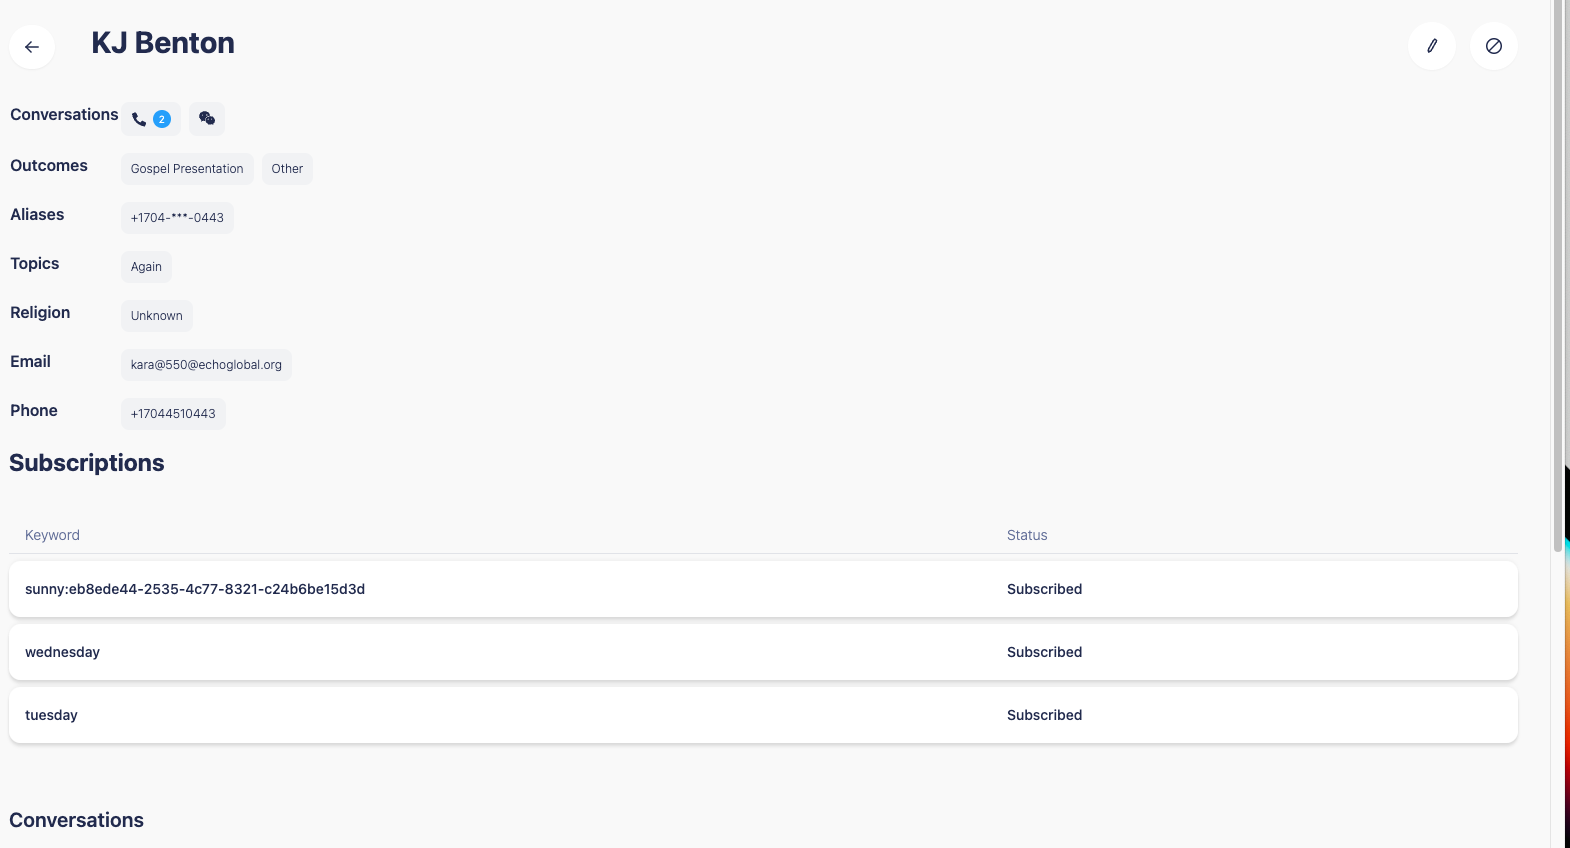
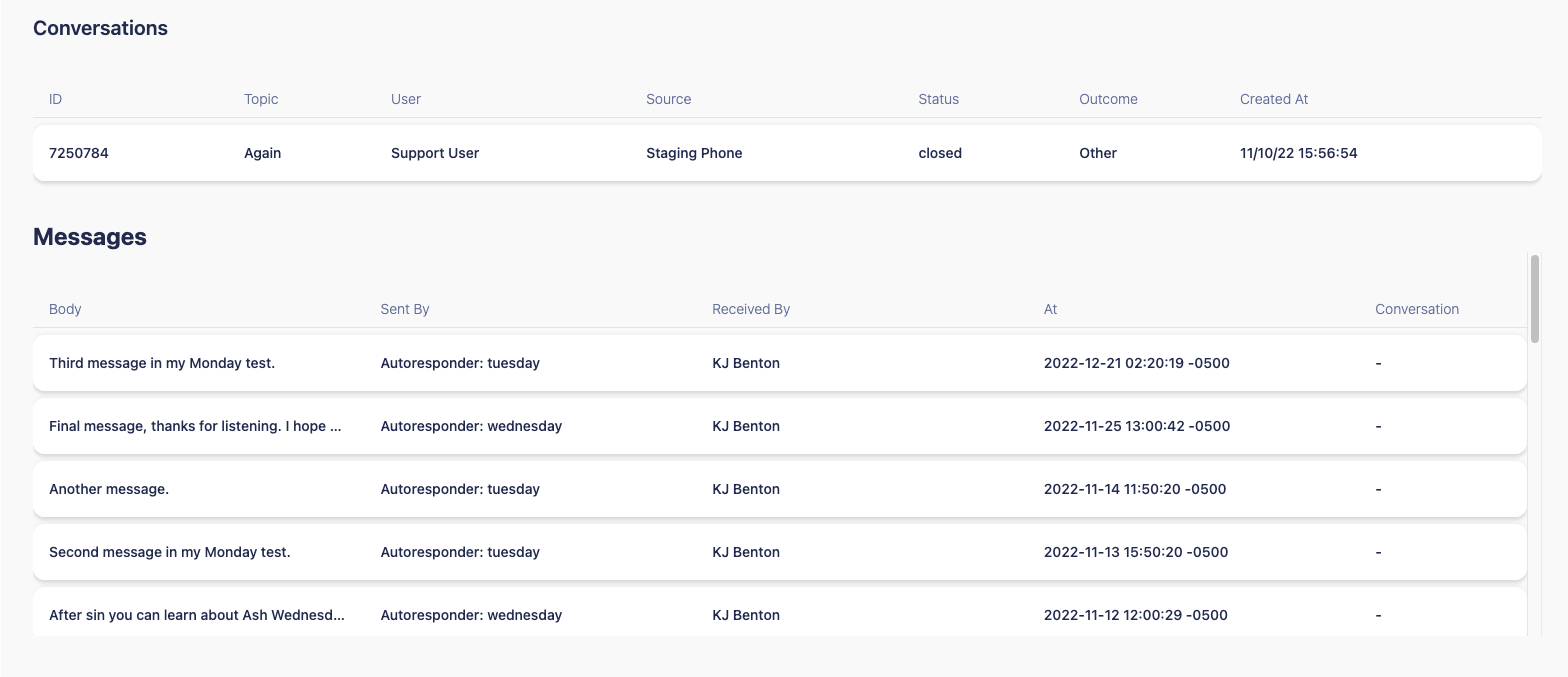
Client Name: Clicking on the client name will open a box where you can view all of the information Echo has stored about this client, including the client summary, conversation counts, subscription status, autoresponder subscriptions, conversation history, and recent autoresponder messages the client has received.
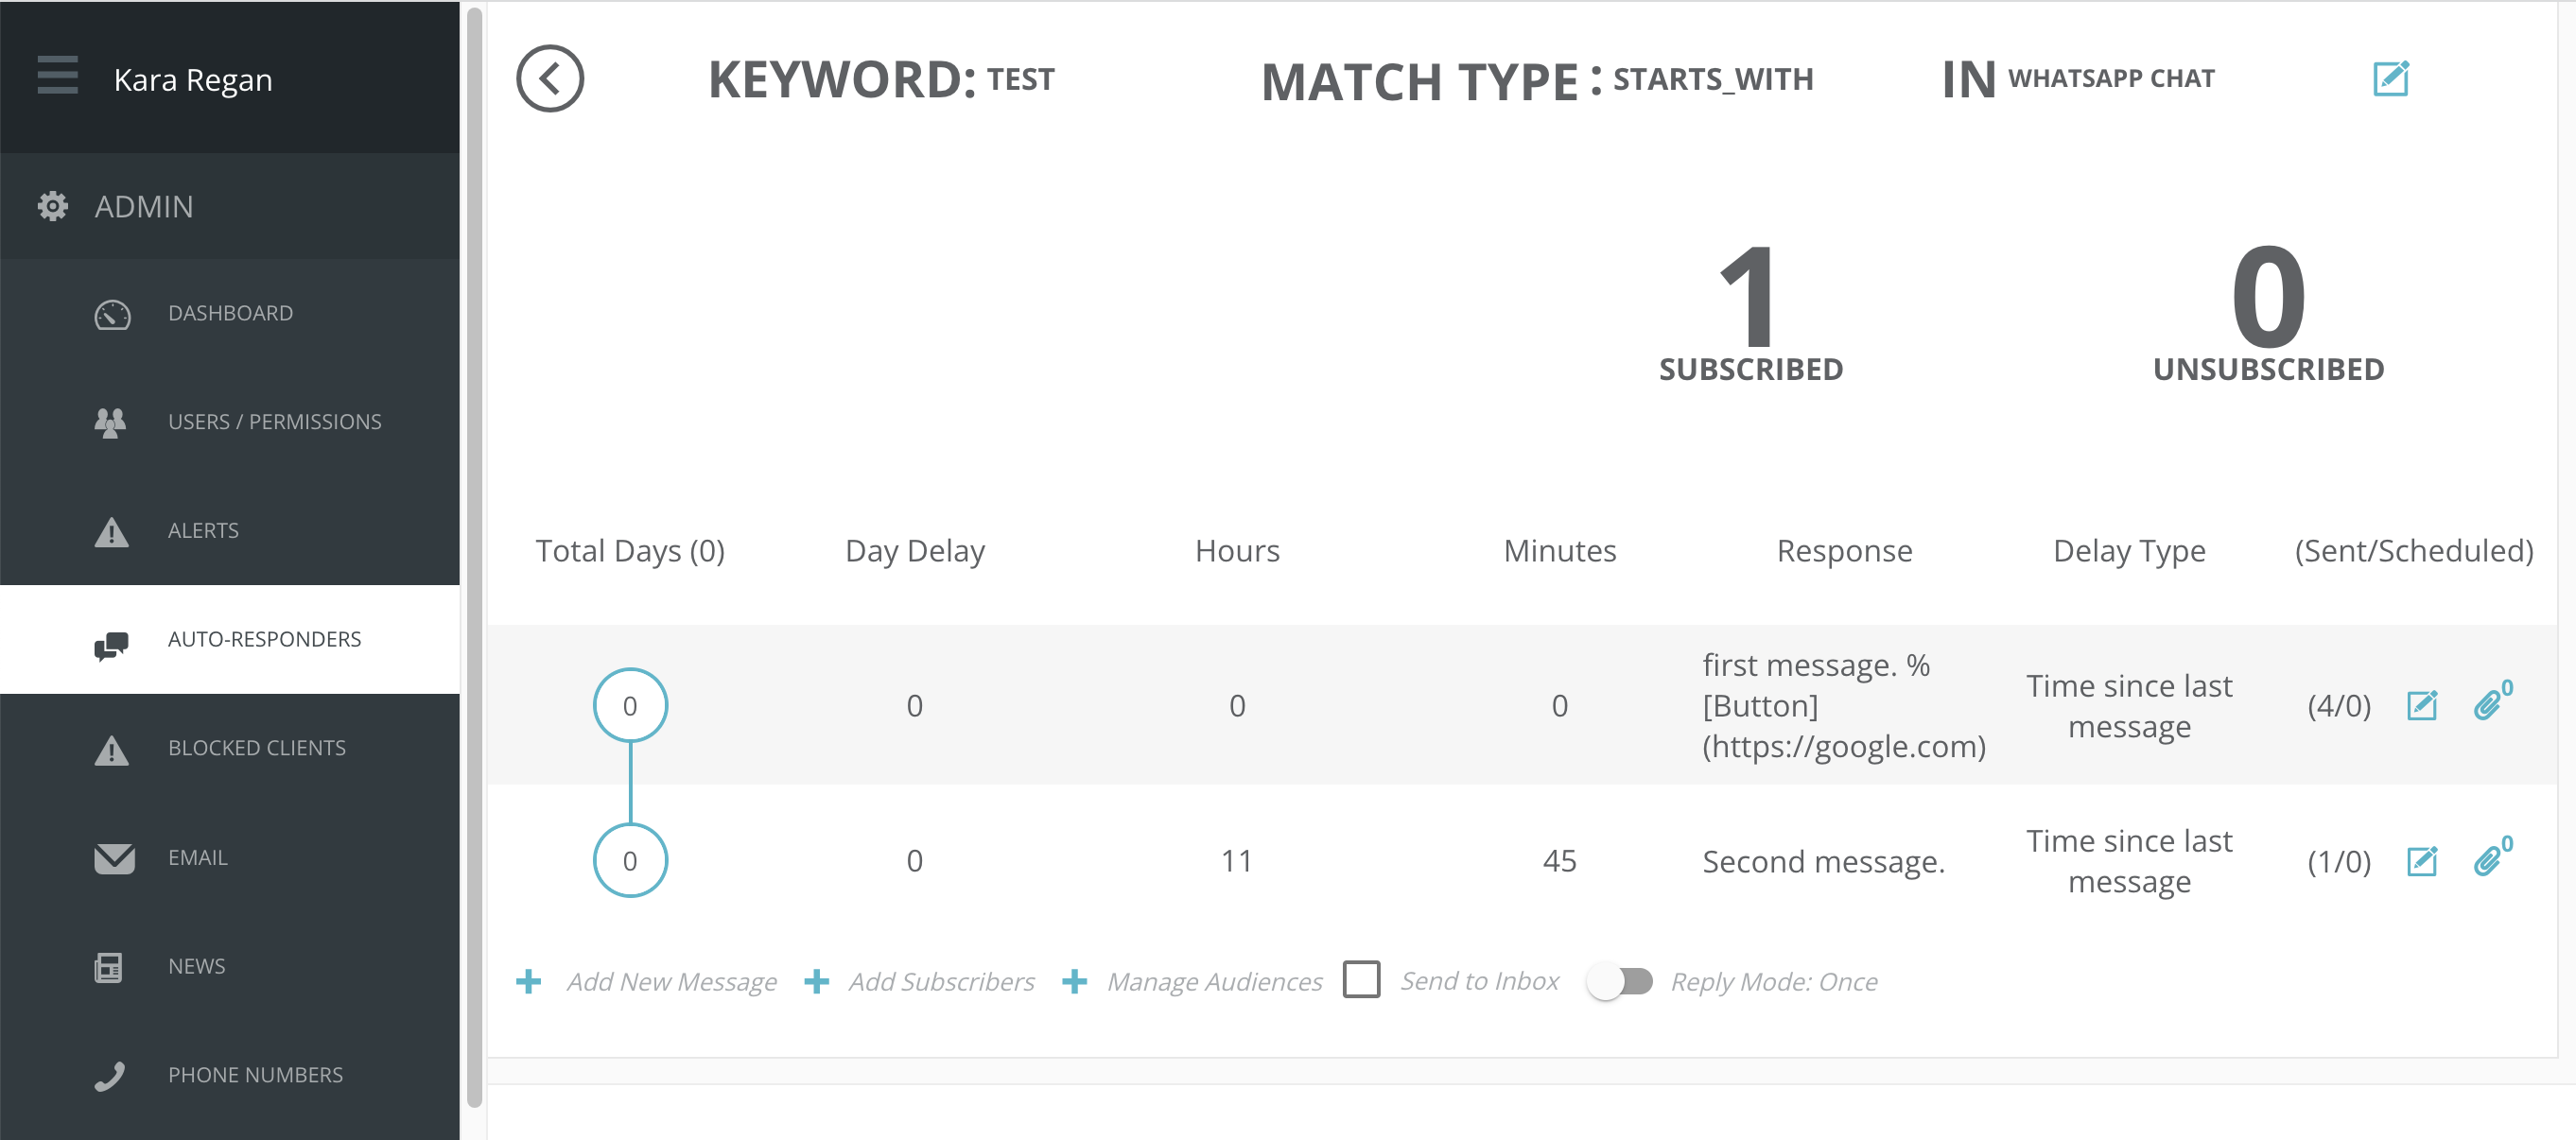
Keyword: If you click on the keyword the client is subscribed to, it will take you to the autoresponder setup area associated with that keyword (if you have access to this area).
Editing a Subscriber
There are several actions you can take on a Subscriber from the Subscribers Menu.
The STOP button allows you to manually unsubscribe the client from receiving any future messages.

Once you click on the subscriber’s name, a box will open with additional actions.

Edit - Edit will open a box that will let you edit or add additional basic information about the subscriber.


Block - Will allow you to block the subscriber from communicating with Echo for the duration you choose.
Unsubscribe All - This will unsubscribe the client from all keywords. They will not be able to subscribe to any future keywords or receive any additional text messages until they resubscribe by texting the word "start" to your Echo phone number.
Activity Report - Click Activity Report to download a CSV file of an overview of activity for a subscriber.
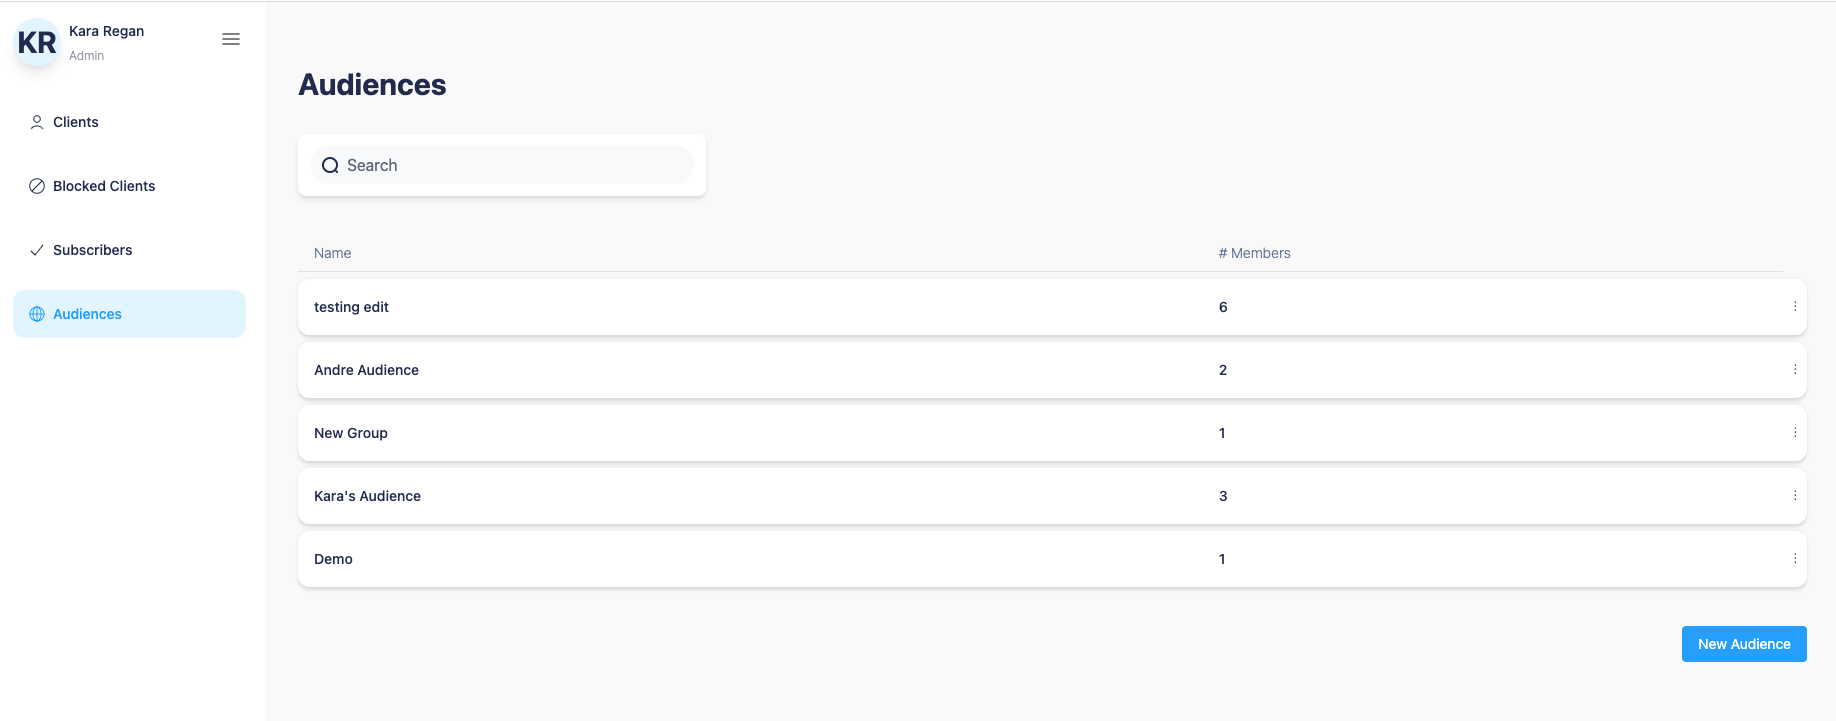
Audiences:
The Audiences menu is where you can view your existing audiences and add new ones. Audiences are only for use with SMS Autoresponders, to send a text message blast to a specific group of users that you've added to an audience.
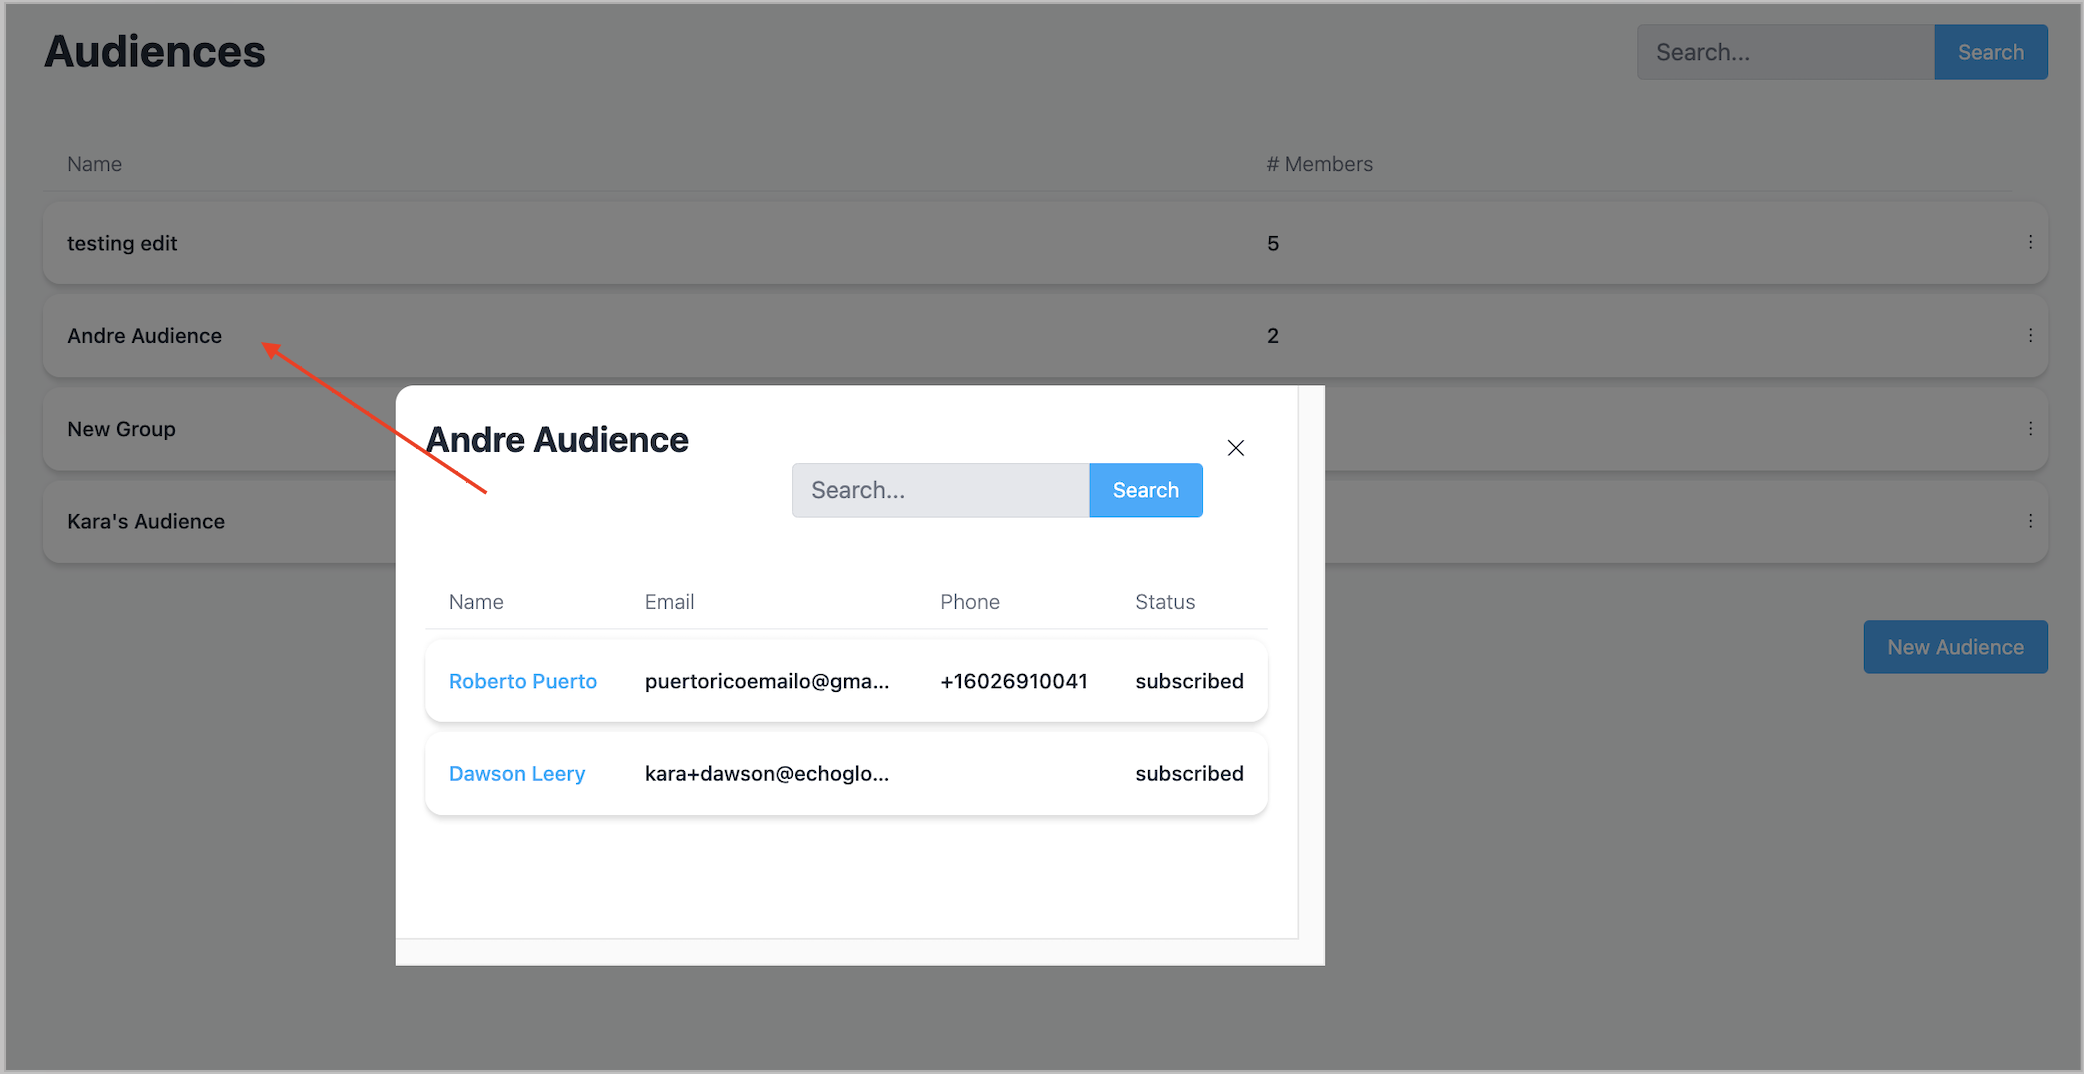
To view the audience members assigned to an audience, click on the name of the audience.
To add a new Audience, click on the "New Audience" button and provide a name for your audience. Make sure the name is unique enough that you will understand what group it was created for.
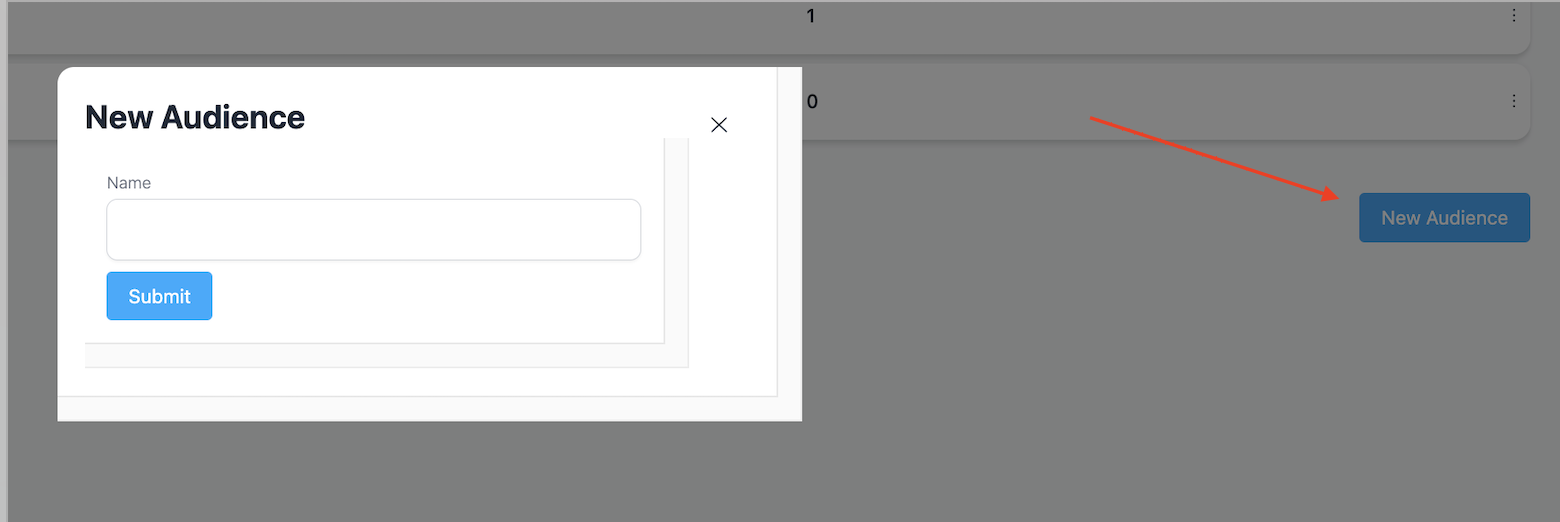
Once you've submitted the Audience name, it will display in the list of audiences.
You are now able to import audience members to the audience from the actions menu at the end of the row for the audience you want to update.

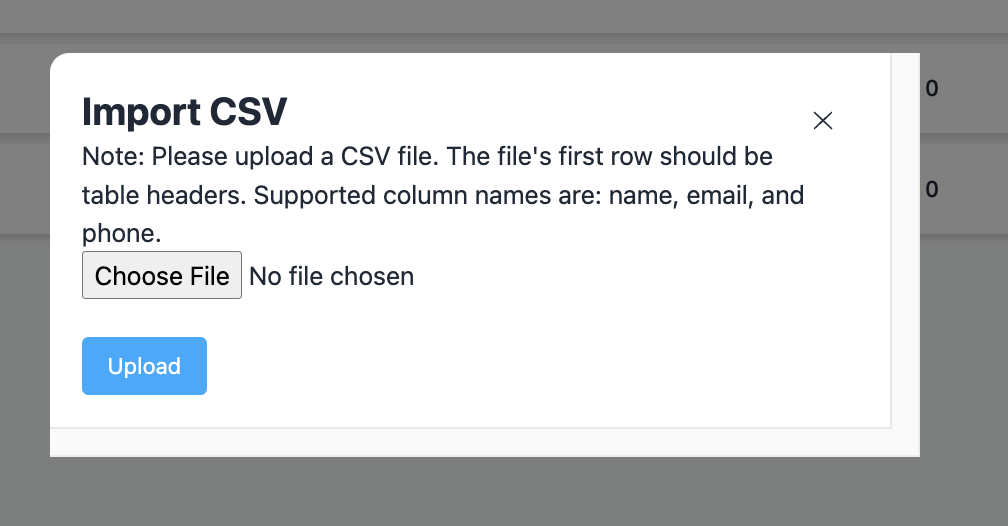
Click on Import CSV to upload a CSV file of audience members. The headings for the CSV must have to column headings of name, email, and phone. No other column heading are supported. Choose your CSV file and click upload.
Click on "preview import" to see the pending audience members.
From the actions menu, you can also update the name of your audience.

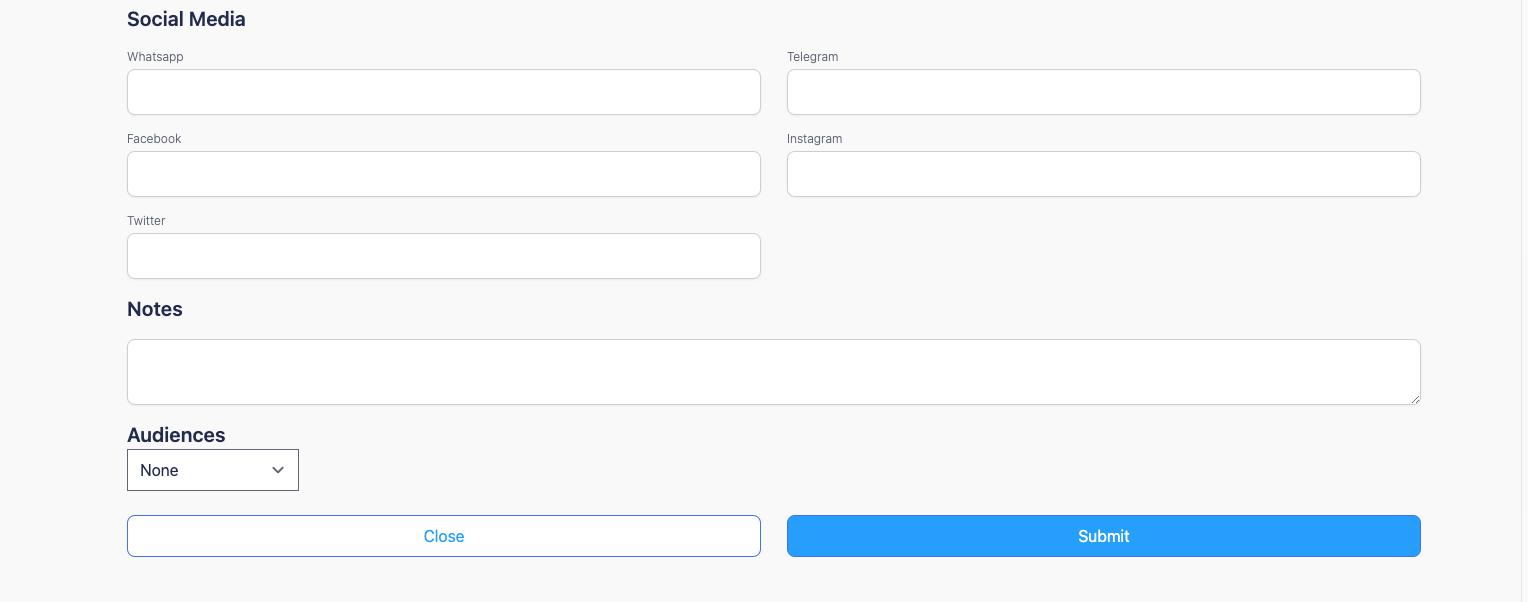
There is one other place you can add an existing client to an audience outside of the audience member import. This is from the client record in the clients menu.
Select the client you would like to add to an audience, click to edit their record, and scroll down to the bottom of the box. Here you will see the option to select an audience to assign this client to.