Conversations Report

About
The new Conversation Report in Echo's analytics tab provides comprehensive tools for analyzing your conversation data. This enhanced system replaces the previous reporting interface with improved filtering capabilities, speed, saved search functionality, and flexible export options.
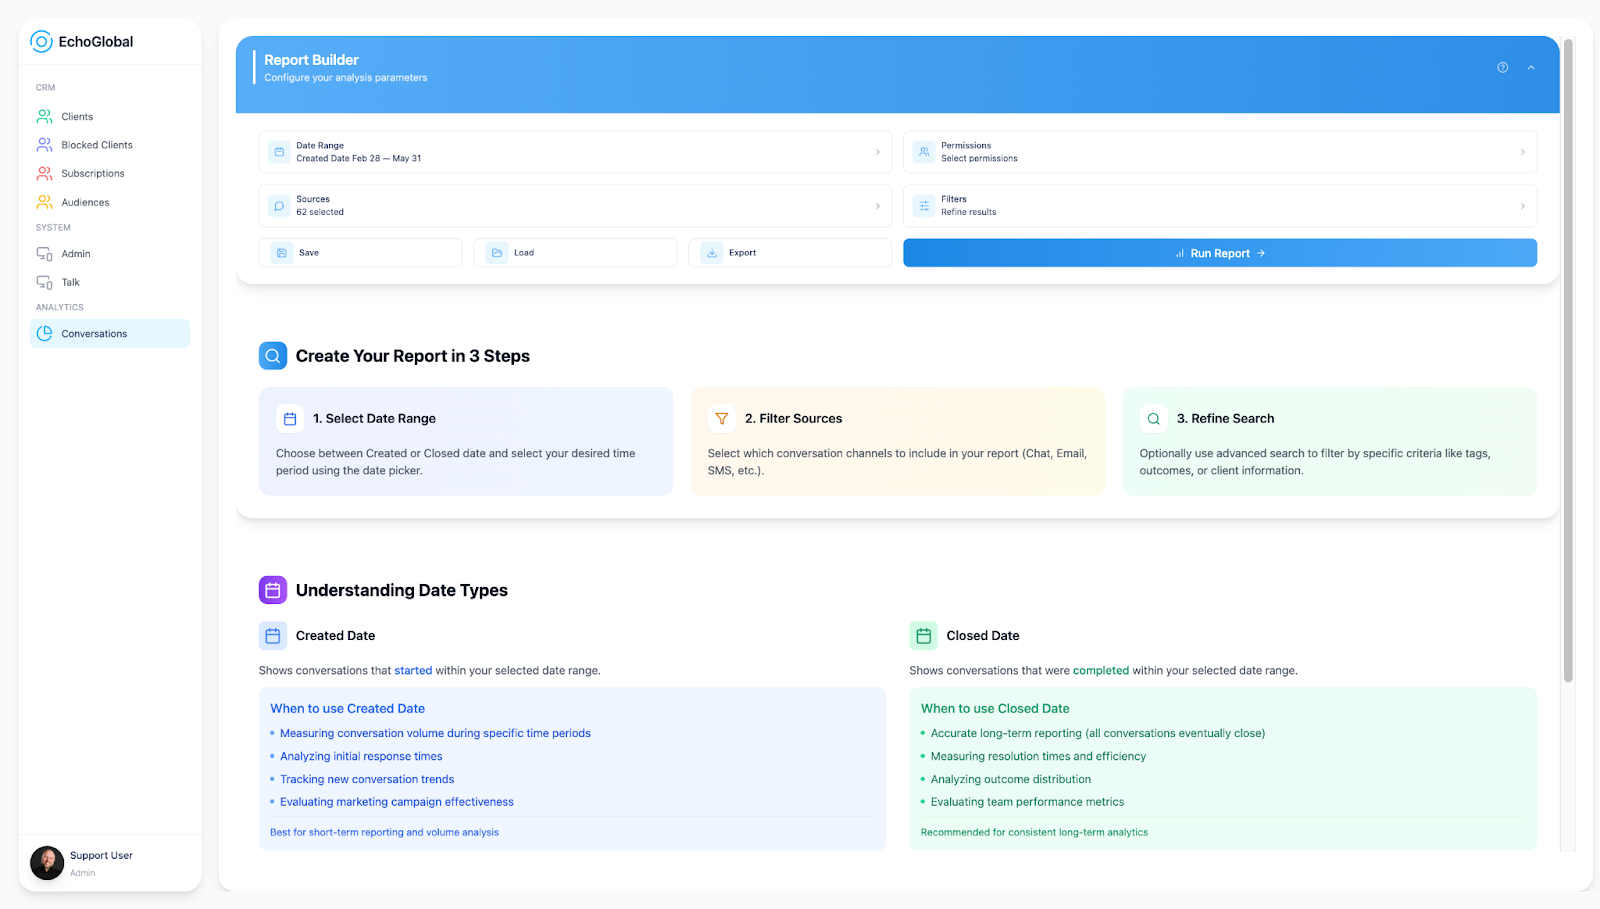
When you first access the new Conversation Report, you'll see:
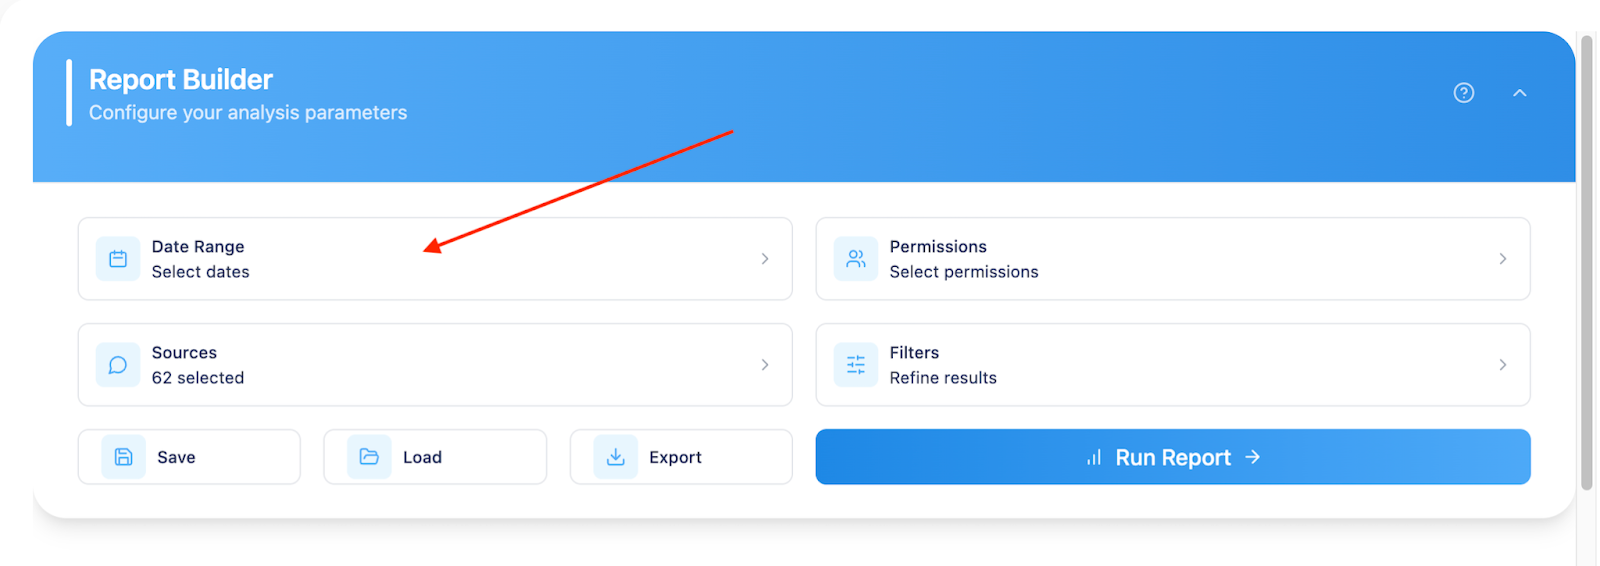
- Report Builder (top section) - Your primary tool for configuring searches
- Getting Started Help (middle section) - Quick tips and guidance
- Tutorial Area (bottom section) - Explanation of Created Date vs Close Date
The tutorial section addresses the frequently asked question about date selection, replacing the previous "created at" and "close at" terminology with clearer "Created Date" and "Close Date" labels.
Understanding Date Types
Before building any report, you need to understand the two date options:
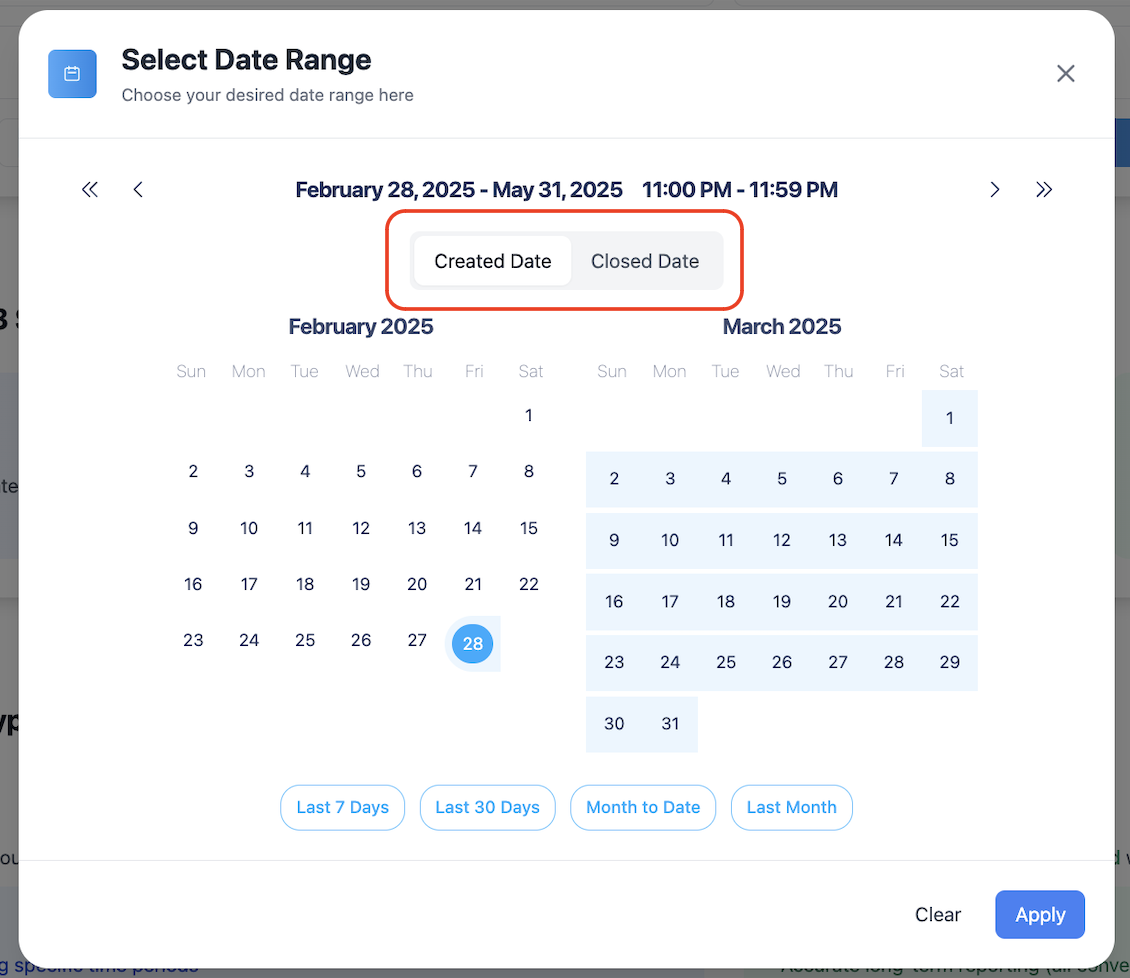
- Created Date: When conversations were initially started by clients
- Close Date: When conversations were marked as completed by your team
Choose based on your analysis goals:
- Use Created Date for intake analysis and engagement trends
- Use Close Date for completion metrics and resolution timeframes
Building Your Report
Step 1: Setting Your Date Range
Click on the date range field to open the date picker interface.
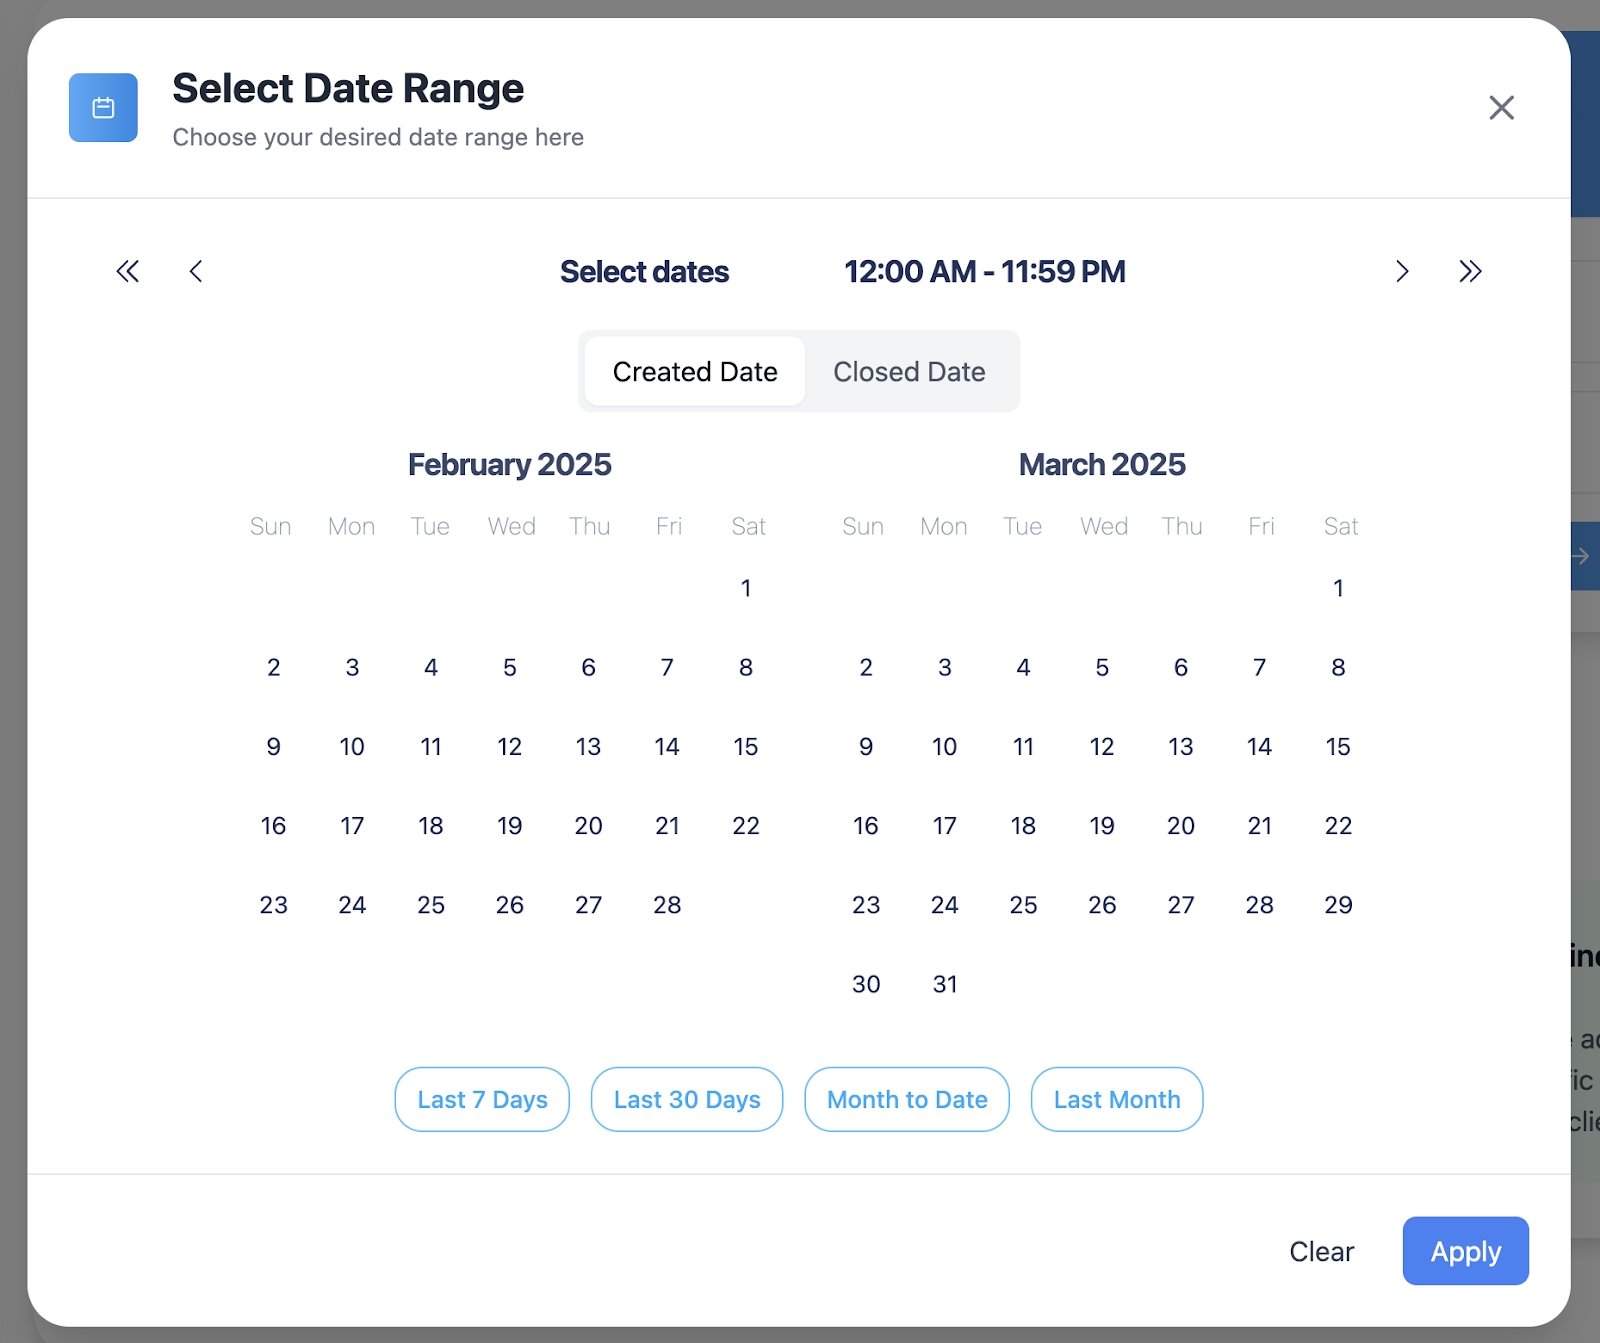
Predefined Options:
- Last 7 days - Quick weekly analysis
- Last 30 days - Monthly overview
- Month to date - Current month progress
- Last month - Complete previous month data
Custom Date Selection: For specific date ranges, use the custom picker. Pay attention to time settings - for complete daily coverage, set your time range from 12:00 AM to 11:59 PM.

Click "Apply" to confirm your date range selection.
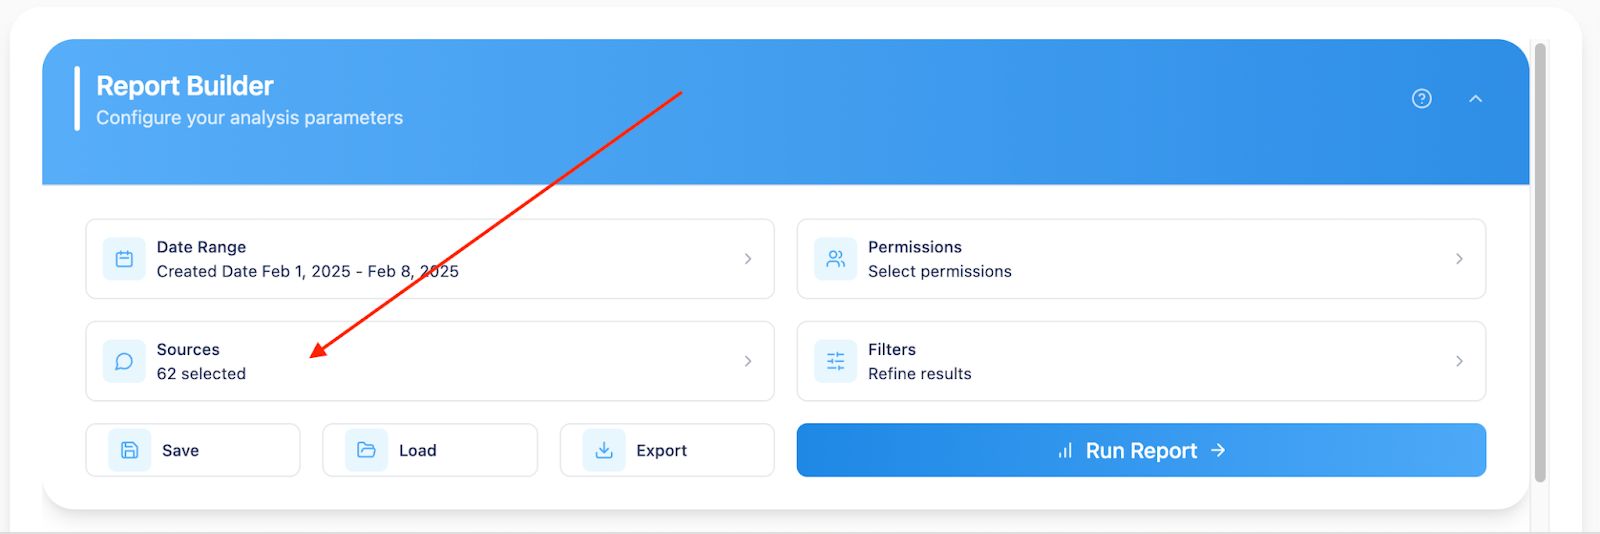
Step 2: Selecting Your Sources
The source picker shows all communication channels in your system.
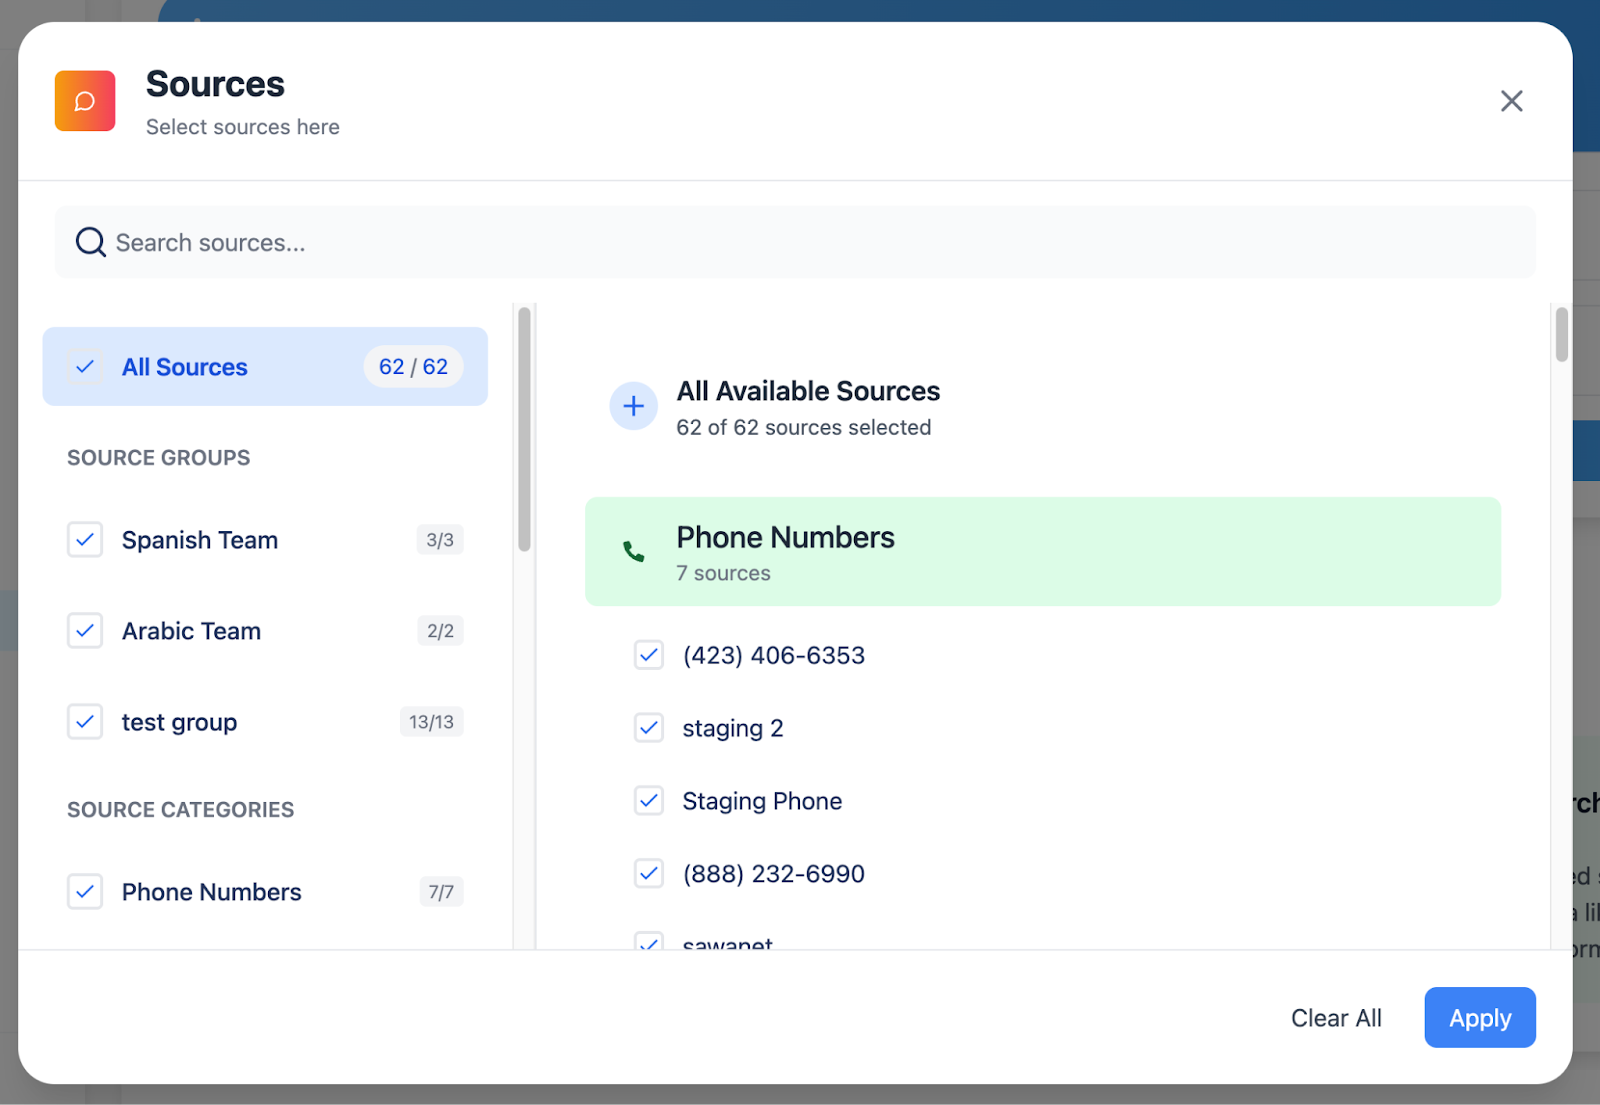
Selection Methods:
- Select All: Check the master checkbox at the top
- Search Sources: Type keywords to find a specific source. (eg. “chat”)
- Source Groups: Check the category checkbox next to the source group you want to select, or click on the group heading to display the sources within that group to select sources within the group.
- Category Selection: Check the category checkbox next to the conversation type heading (Text, Chat, Facebook, etc.) to select all sources within the same category, or click on the category heading to display the individual sources with the category. Click the checkbox next to any individual source you want to select.
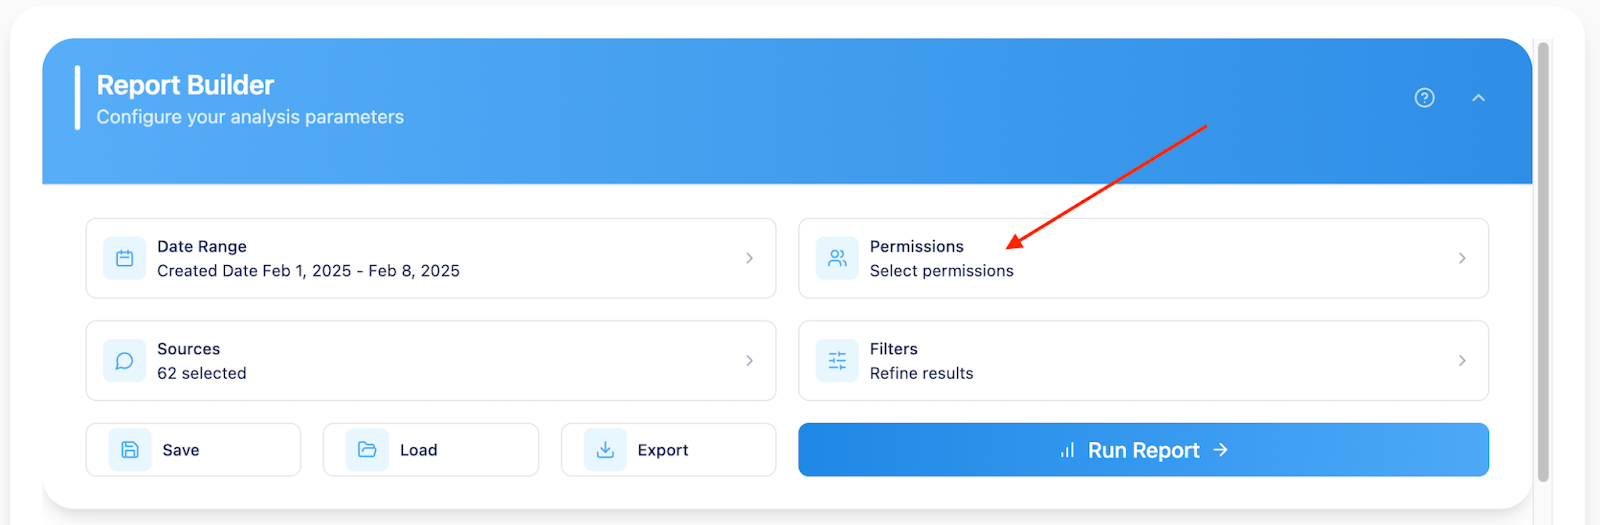
Step 3: Permission Set Filtering (Optional)
Permission sets filter results by specific user groups in your organization.
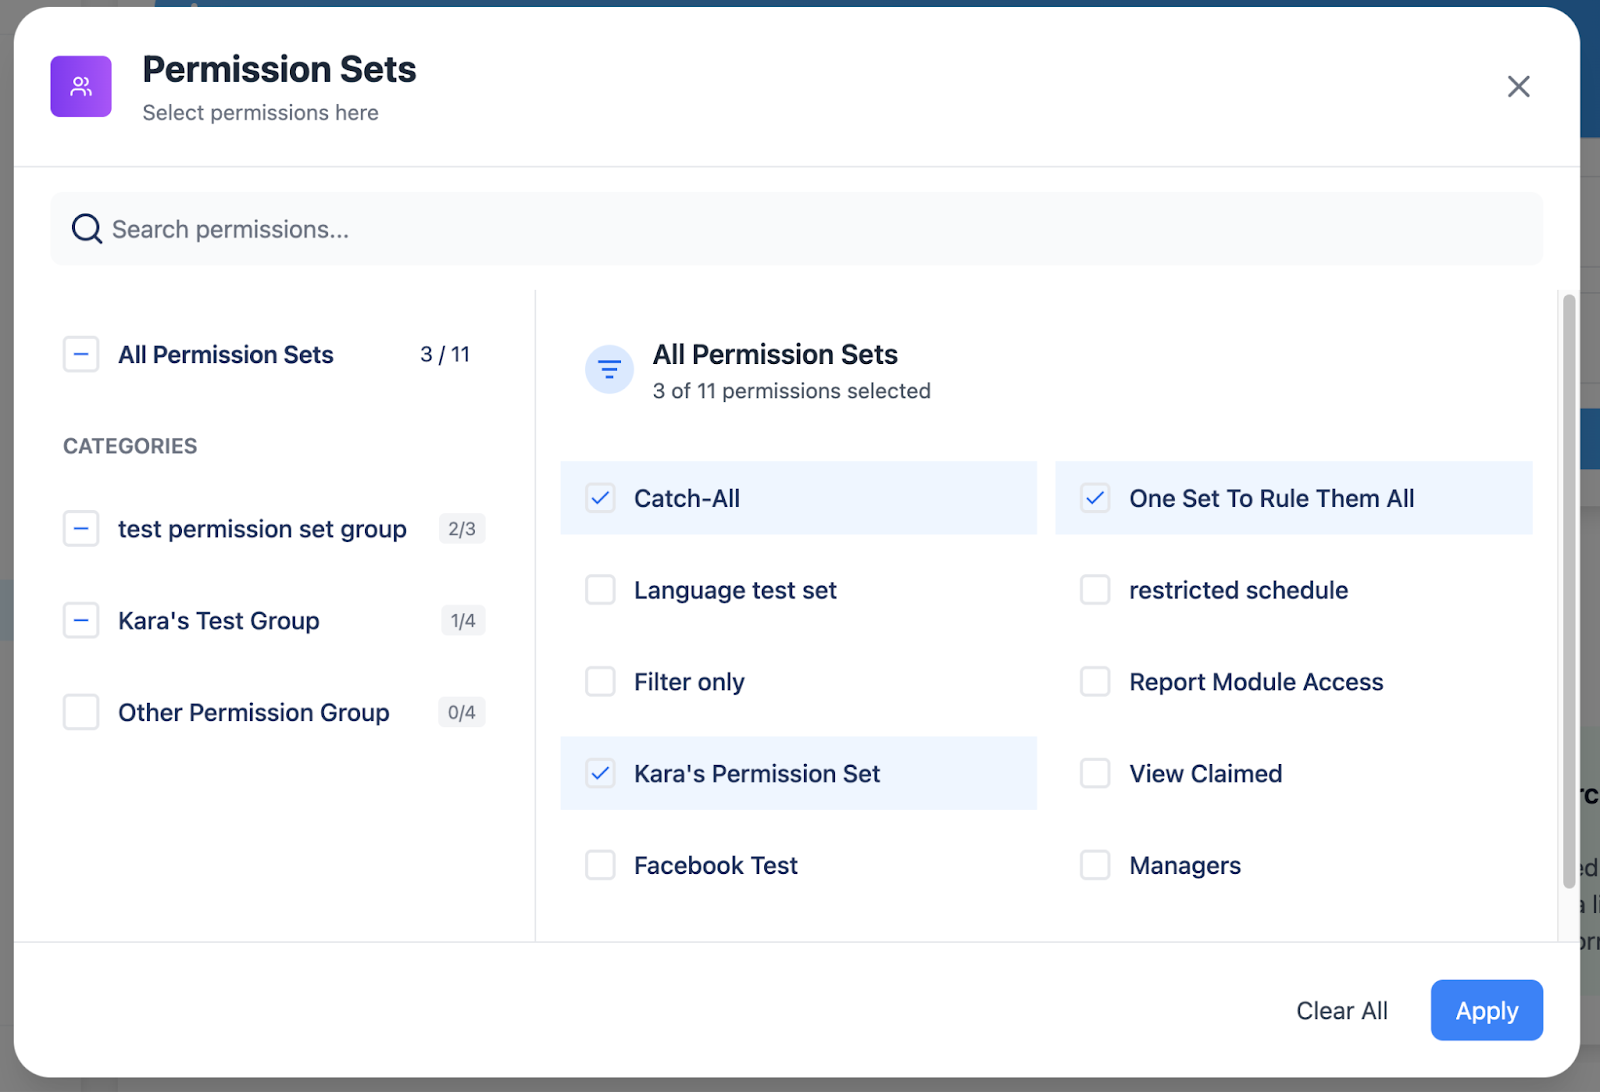
This is where the new Permission Set grouping option comes into play.
Options include:
- Check the checkbox beside a category group to select all permission sets within a specific permission set group
- Click on the category heading to display and select an individual permission set or sets within groups
- Select all permission sets to include all user groups
- Choose no permission sets to include all team members (For broad analysis, you may want to skip permission set filtering).
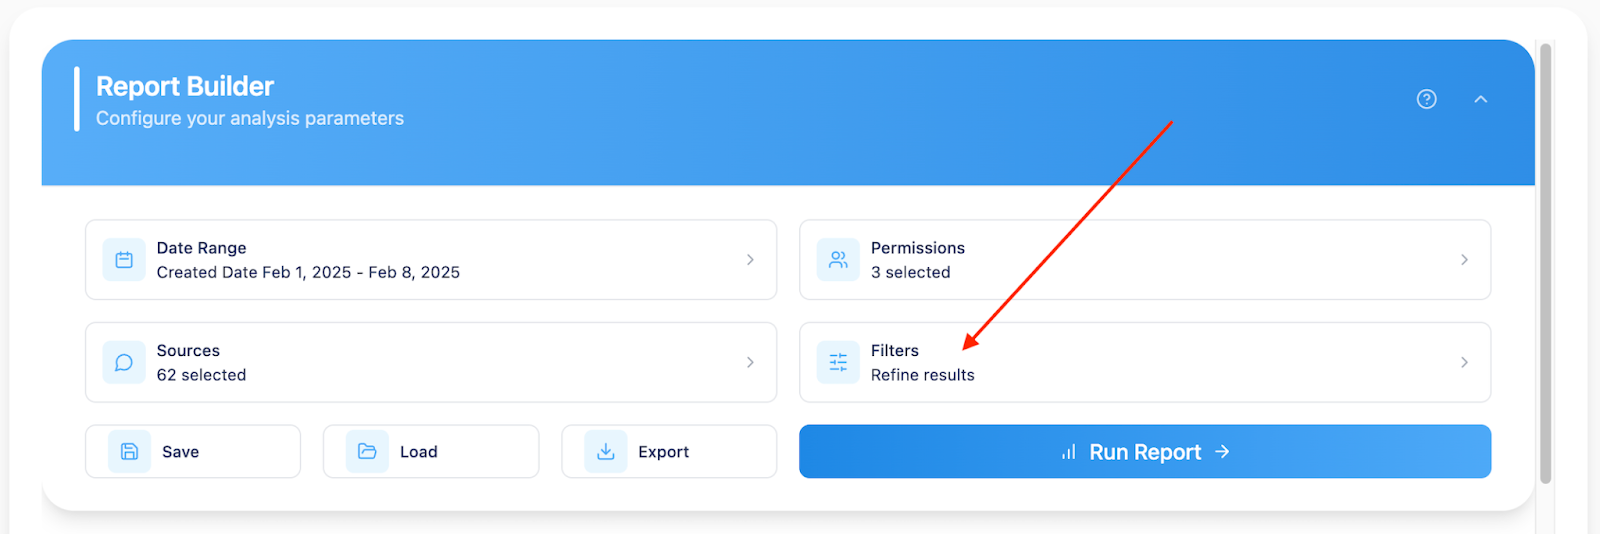
Step 4: Advanced Filtering
The filters section provides sophisticated search capabilities organized into categories.
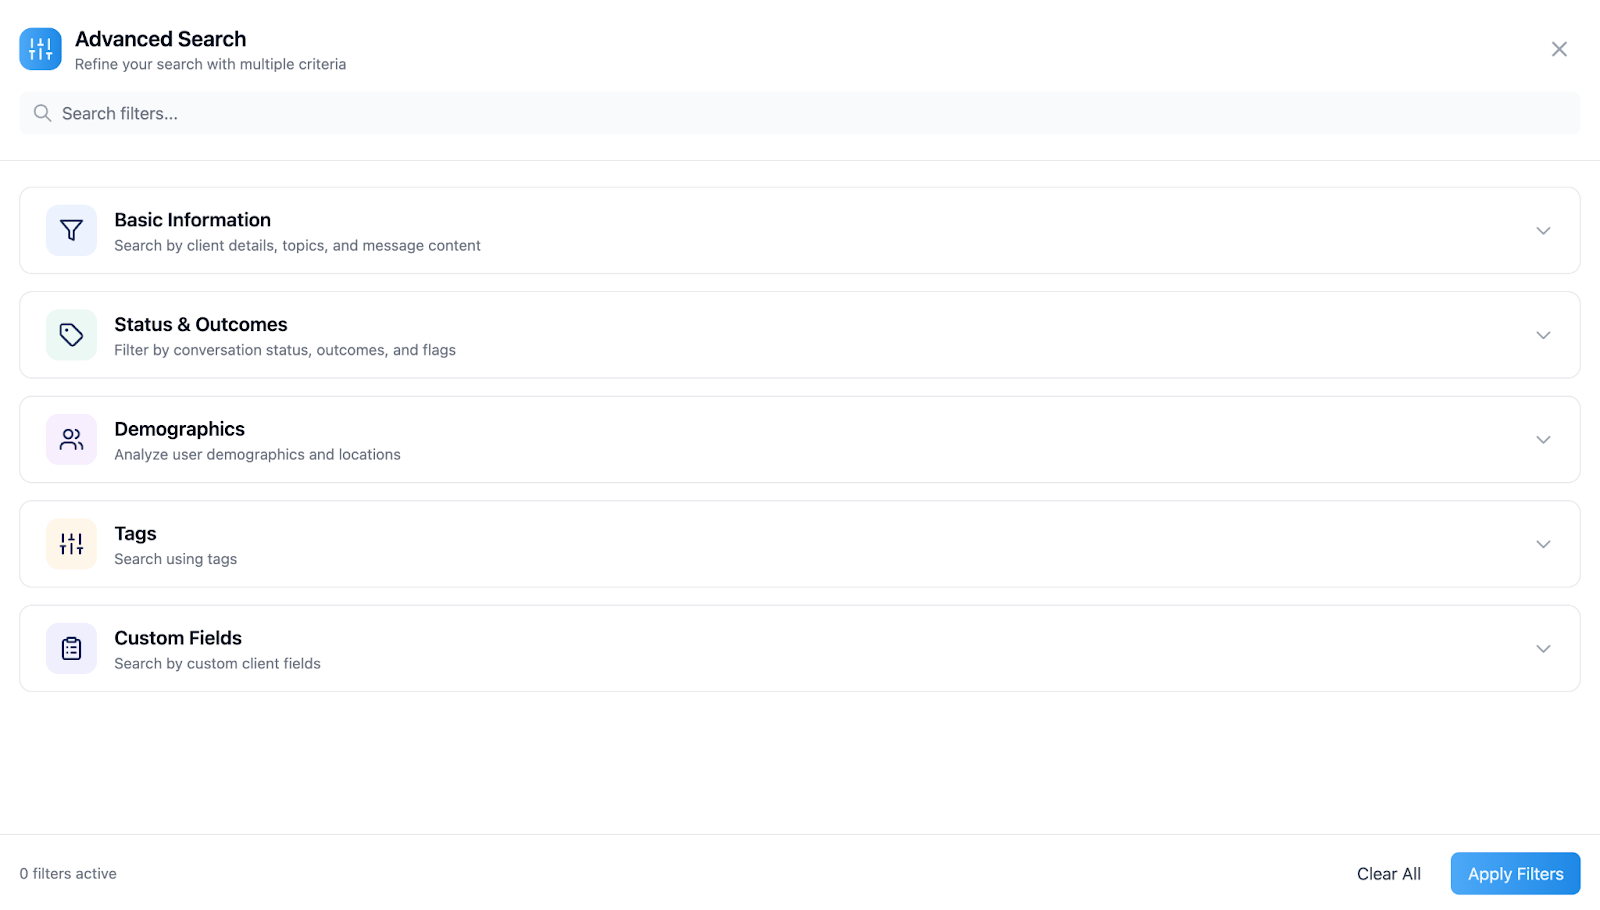
Basic Information
Search by client details, topics, and message content.
Available Filters:
- Client/Seeker Name: Search for conversations with specific individuals
- Phone Number: Filter by client contact numbers
- Email Address: Filter by client email addresses
- IP Address: Filter by client IP Address
- Message Contents: Search for specific words or phrases within conversations
- User Notes: Filter by notes added by Echo User/Resonder/Coach at conversation completion
- Topic: Search by the first message in conversations
- Echo User Name: Find conversations handled by specific team members
Status and Outcomes
Filter conversations by their status, outcomes, and flags.
Available Filters:
- Expired Status: Filter active vs expired conversations
- Not all conversations expire, but some examples of conversations that can expire are: Facebook/Instagram: 7-day expiration window, WhatsApp: 24-hour expiration window.
- Flags: Search conversations marked with specific flags (prayer requests, urgent, etc.)
- Outcomes: Filter by conversation outcome results
- Spam Management:
- Include spam (default)
- Exclude spam from results
- Show only spam conversations
- Conversation Status: Filter by active, hidden, or other statuses conversations may be in.
Demographics
Filter by client demographics and locations.
Available Filters:
- Country: Focus on conversations from specific geographic regions
- Echo Filters: Use your system's routing categories if configured
- Languages: Analyze conversations in specific languages
- UTM Data: Track conversation sources from marketing campaigns if you are using them.
- Age Range: Filter by client age brackets (e.g., 35-44 years)
- Gender: Analyze by male, female, or other
Tags
Filter based on conversation categorization using your tagging system.
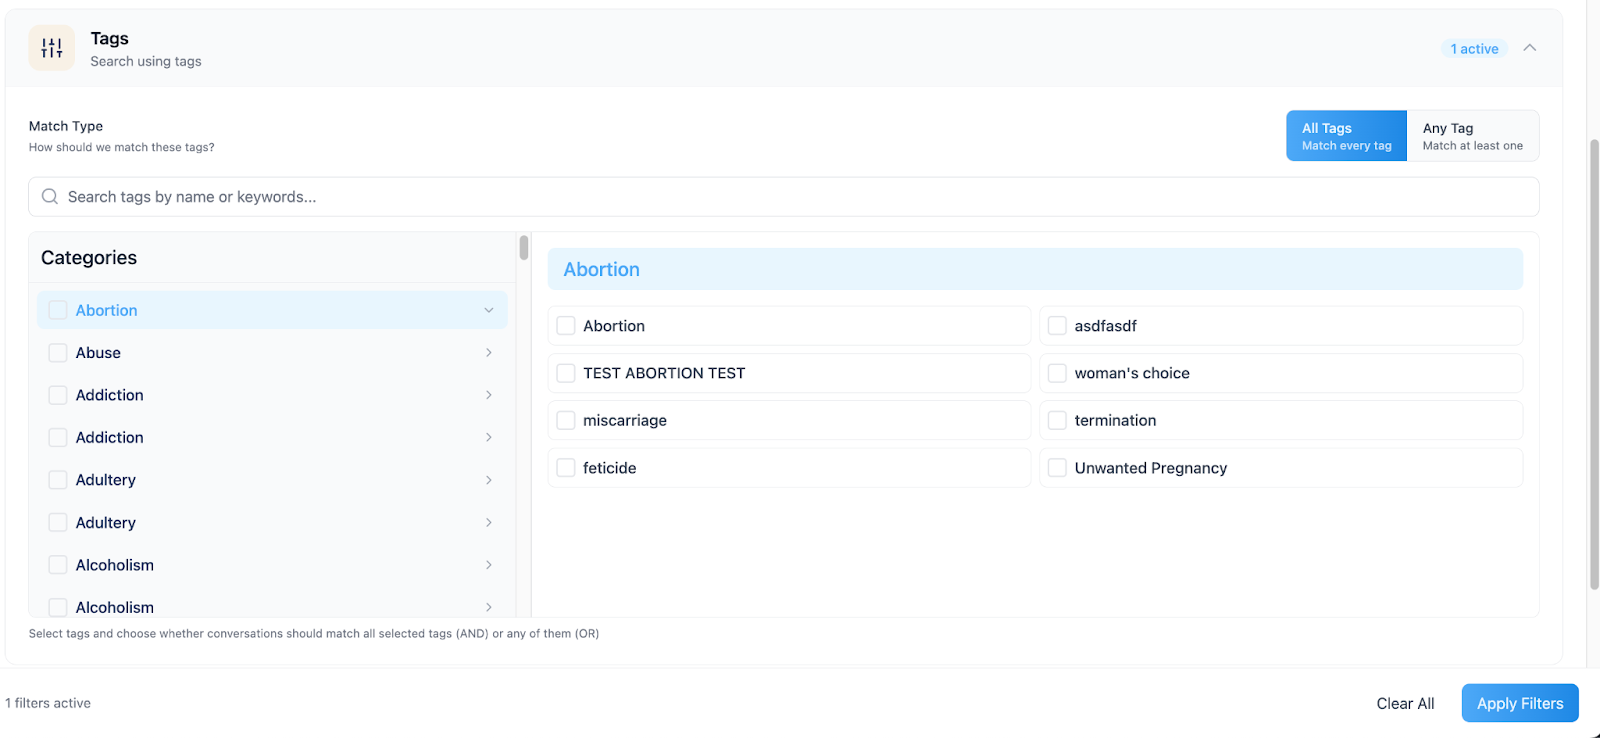
Tag Matching Options:
- All Tags Match: Conversations must have every selected tag to show in results.
- Any Tag Match: Conversations need at least one selected tag to show in results.
Selection Methods:
- Check the checkmark next to the Tag heading to select that tag, and all sub-tags within that tag.
- Click the Tag Heading to show all sub-tags associated with that Tag. Check any tags or sub-tags you want to include in your search.
- Search for a specific tag, and select by checking the checkbox next to the search result.
Custom Fields
Organizations using custom client fields will see the Custom Fields filter category.
This section displays only the custom fields actively used in your system. You will be able to select options within your custom fields in order to filter your conversation search results.
If your organization doesn't use custom fields, this category won't appear.
Step 5: Applying Filters
Once you’ve applied the filters you want in your search, the system shows a summary of your active filter selections.
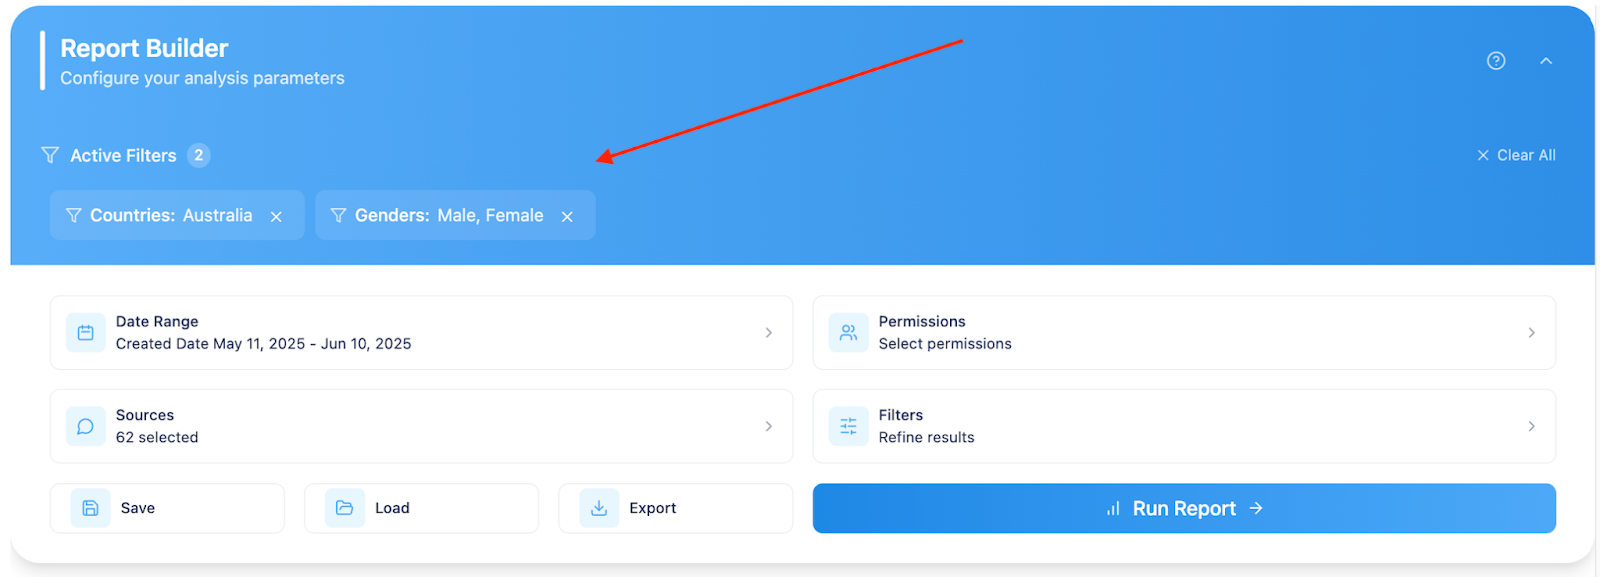
You can review and modify selections before running your report. The summary displays:
- Number of active filters
- Specific filter categories and values selected
- Options to modify or remove filters
When you’re ready, click on the “Run Report” button to get your search results.
Saving and Managing Searches
Creating Saved Searches
Save frequently used report configurations as reusable templates.
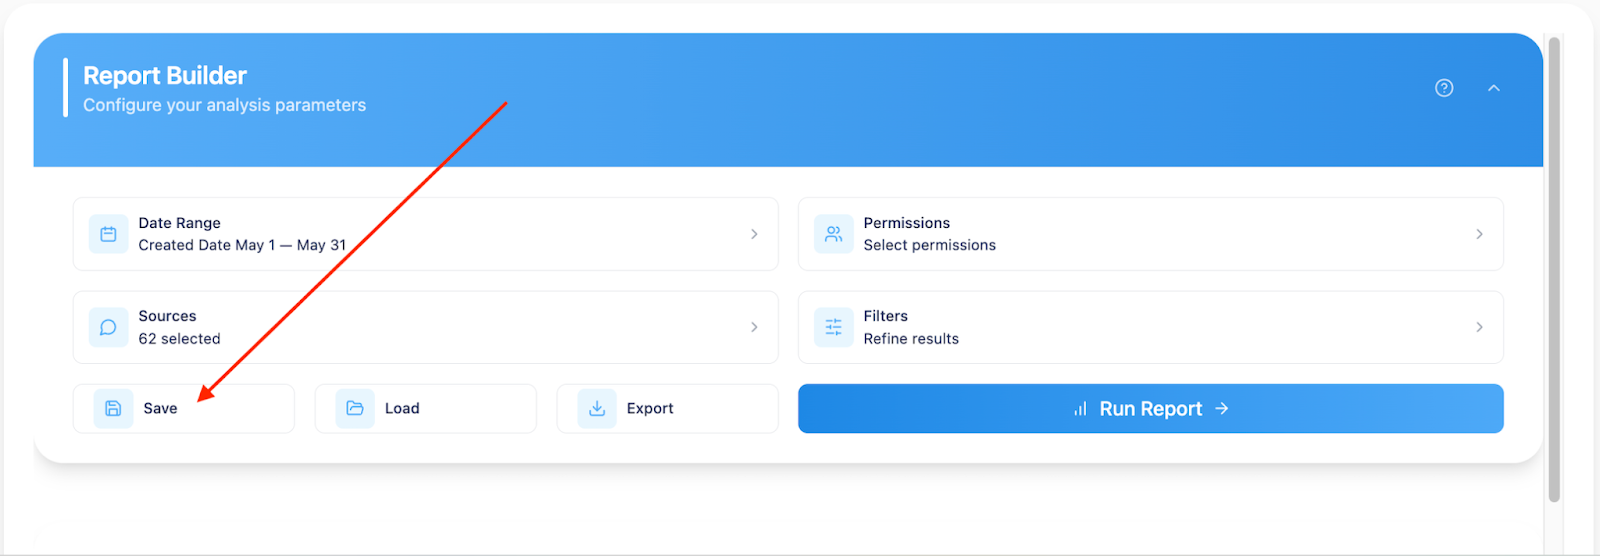
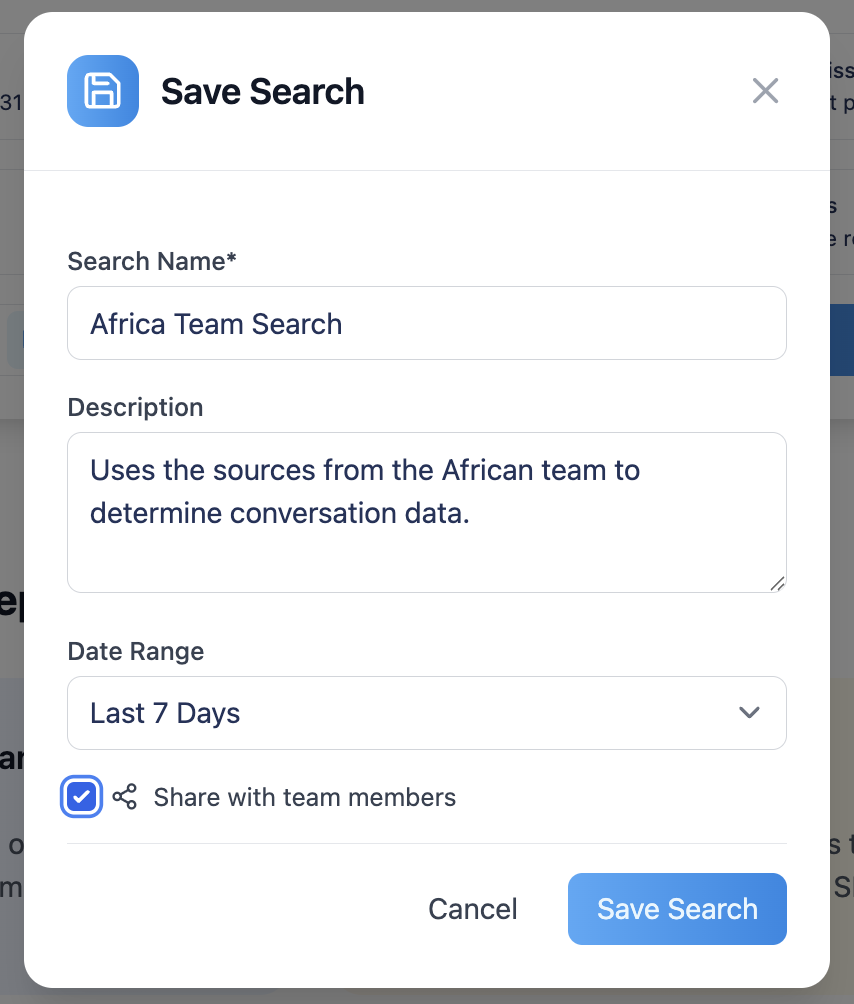
To Save a Search:
- Click "Save" after configuring your report
- Enter a descriptive name (e.g., "Monthly Prayer Request Analysis")
- Add optional description for additional context
- Choose sharing settings:
- Private: Visible only to you
- Share with team members: Available to all report users
- Click “Save Search”
Use clear, descriptive names that will help identify the search purpose later.
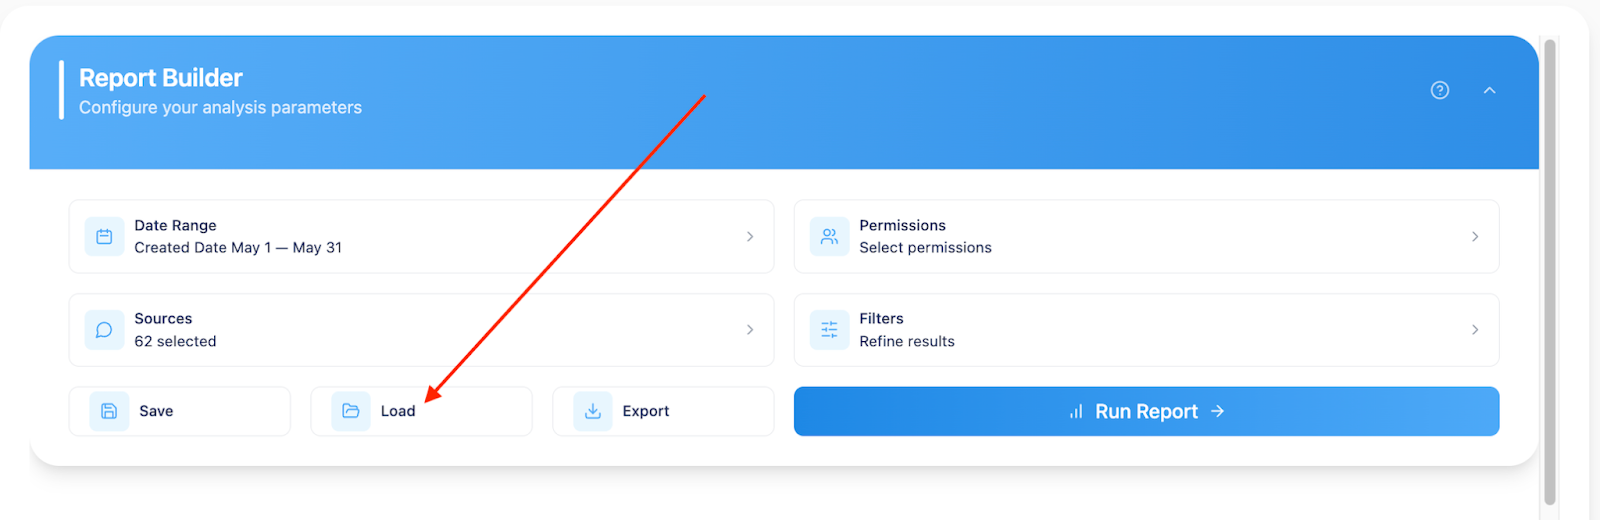
Loading Saved Searches
Access saved searches through the Load function.
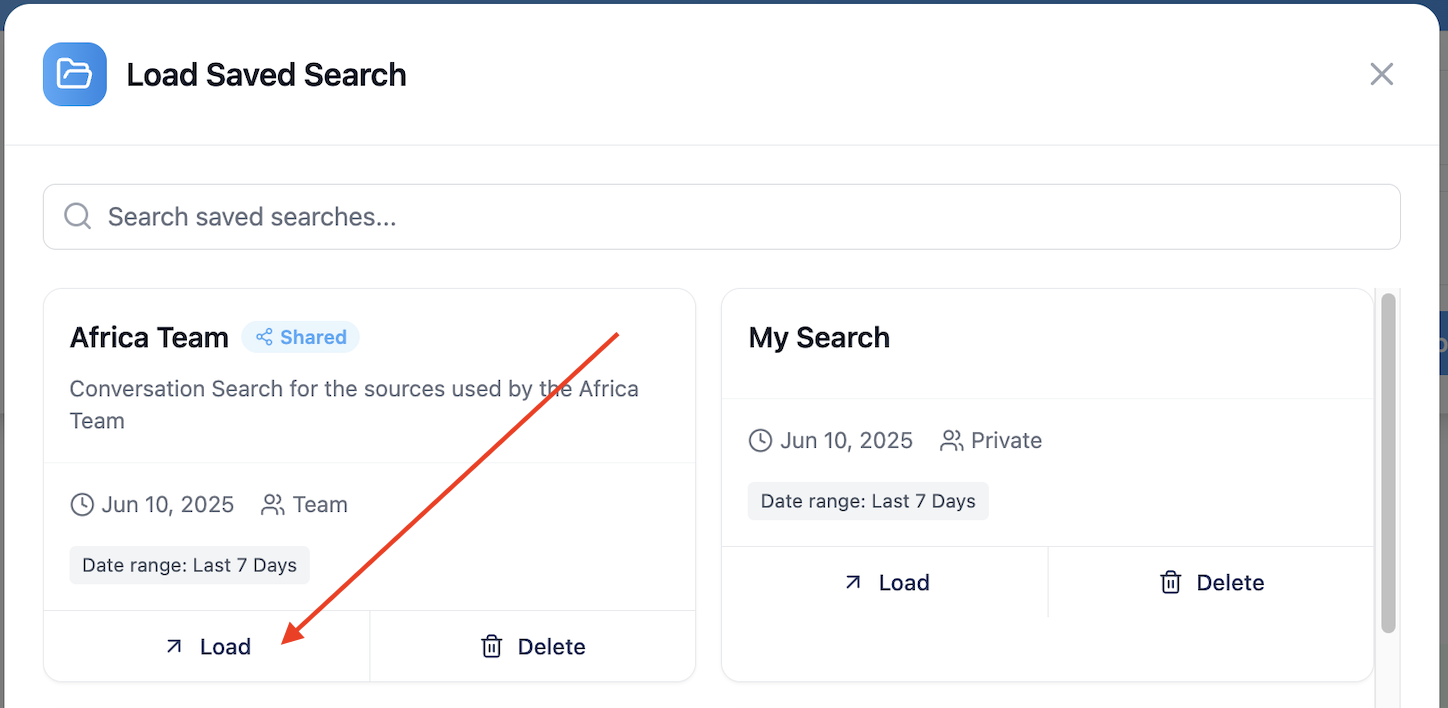
The Interface Shows:
- Search Name: Your descriptive title
- Date Range: The configured time period
- Privacy Setting: Private or shared status
- Creation Date: When the search was saved
- Search Function: Filter through saved searches as your list grows
Loading a saved search automatically populates all previously configured parameters in the report builder; where it’s ready for you to select “Run Report”.
Export Options
Configuring Exports
The export functionality provides flexible options for obtaining your conversation data in usable formats. Currently, the system supports CSV and Excel exports. The choice between CSV and Excel typically depends on your intended use for the data, with Excel offering enhanced formatting options and CSV providing broader compatibility with various analysis tools.
Delivery Methods
The system offers two distinct delivery methods to accommodate different report sizes and user preferences.
An important feature of the export system is the ability to generate exports without first running the report display on screen. This capability is particularly valuable for large datasets where you only need the spreadsheet output and don't require the on-screen analysis. You can configure your entire search, select your export options, and generate the export directly without waiting for the screen display to process.
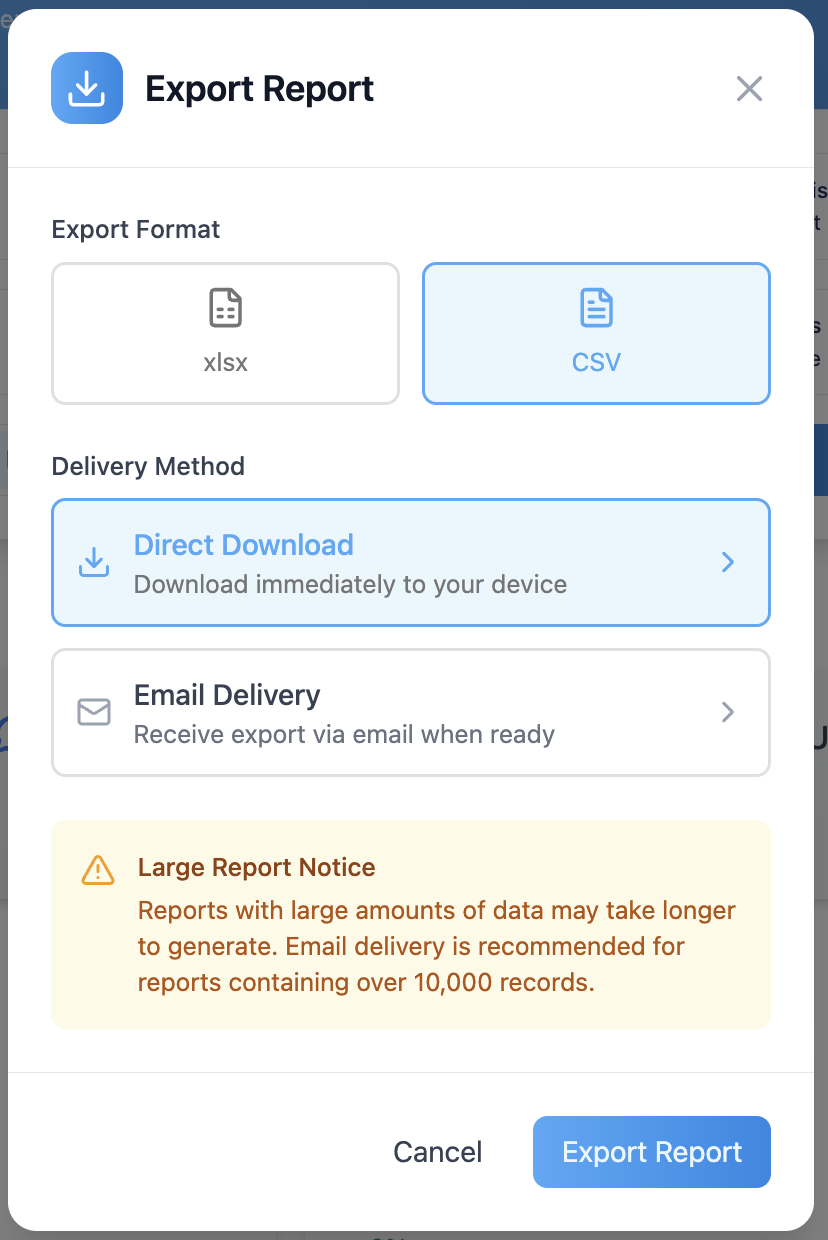
Direct Download: Best for smaller reports and immediate access. The system processes your request and provides an immediate download link (may take a few minutes to load).
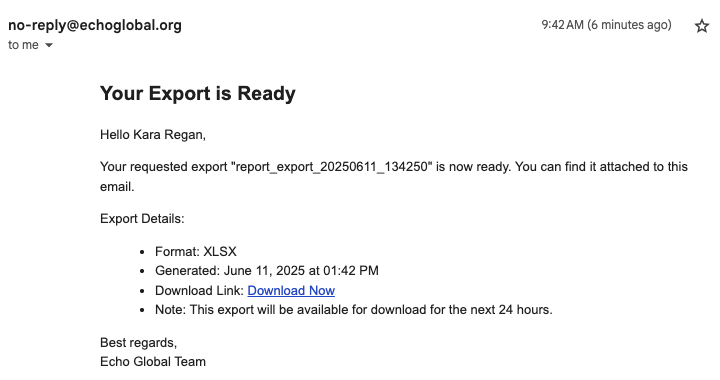
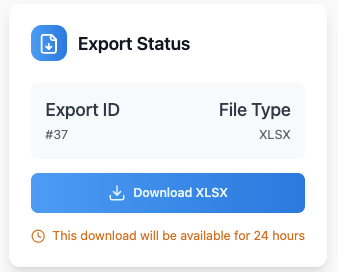
Email Delivery: Email delivery represents a significant enhancement for users dealing with larger datasets or longer time periods. When you select email delivery, the system processes your report in the background and sends you an email notification when the report is complete. The email contains a download link that remains active for twenty-four hours, after which the report file is automatically removed from the system. This method prevents timeout issues that can occur with large reports and allows you to initiate long-running reports without maintaining an active browser session.
Benefits include:
- Background processing - no need to keep browser open
- Timeout prevention for large reports
- 24-hour download link access
- Email notification when ready
You can generate exports without first clicking Run Report and displaying results on screen.
This is valuable when:
- You only need spreadsheet data, not screen analysis
- Working with large datasets that are slow to display
- Running multiple reports efficiently
- Automating regular reporting processes
Understanding Your Results
Summary Statistics
Report results begin with high-level metrics.

Key Metrics:
- Total Conversations: Number of total conversations that match your search criteria.
- Unique Clients: Individual clients represented in the conversations that match your search criteria. (If client has multiple conversations in the search results, we only count them once.)
- Active Users: Your Team Members (Echo Users, Coaches, Responders) that are represented in the conversations that match your search criteria.
- Average Response Time: Team responsiveness (shows "Not applicable" for conversations without responses). The average response time to client messages. Specifically, this is the time from the conversation entering the inbox, to when the user sends the first message.
Demographic Analysis
When using demographic filters, the system provides percentage distributions.
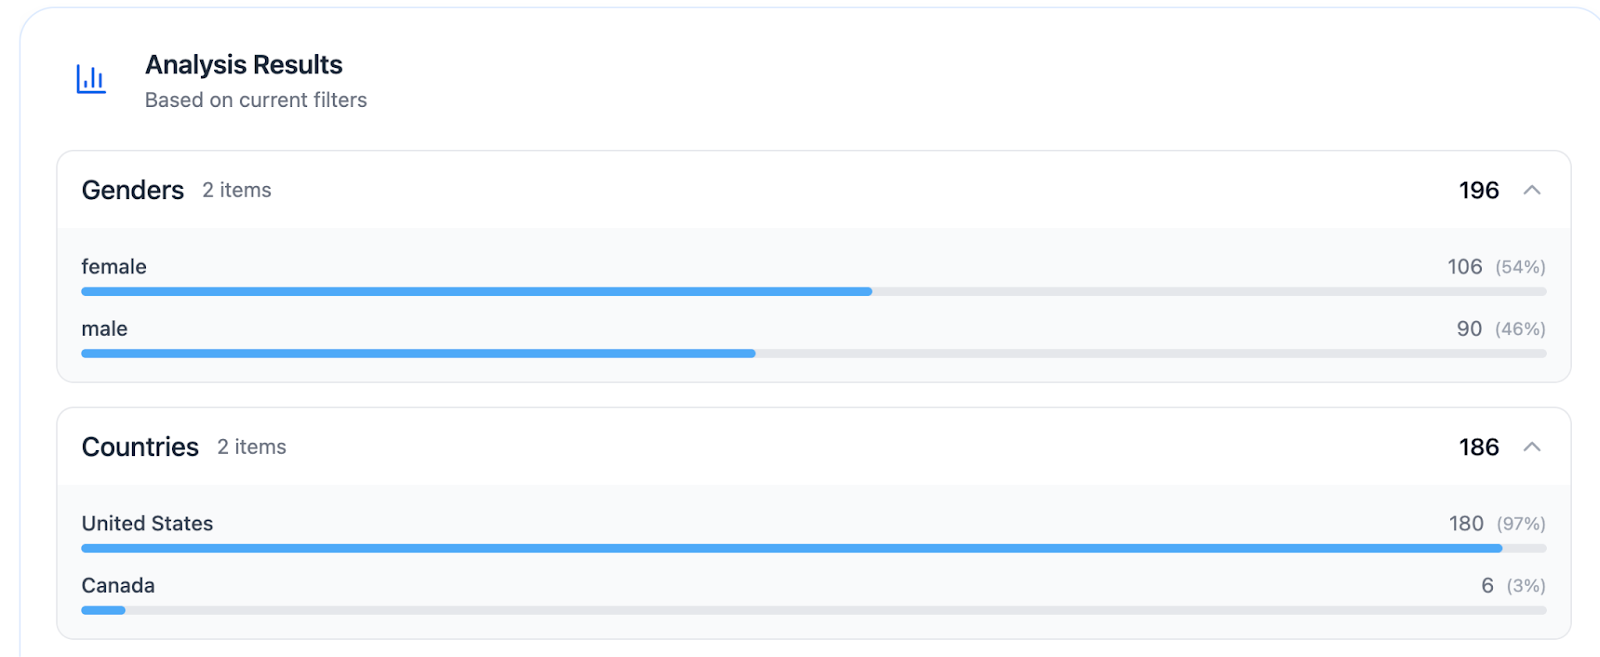
These breakdowns help identify:
- Client demographic patterns
- Engagement trends across different groups
- Opportunities for targeted outreach
Platform-Specific Analysis
Results are organized by conversation type with platform-specific insights.
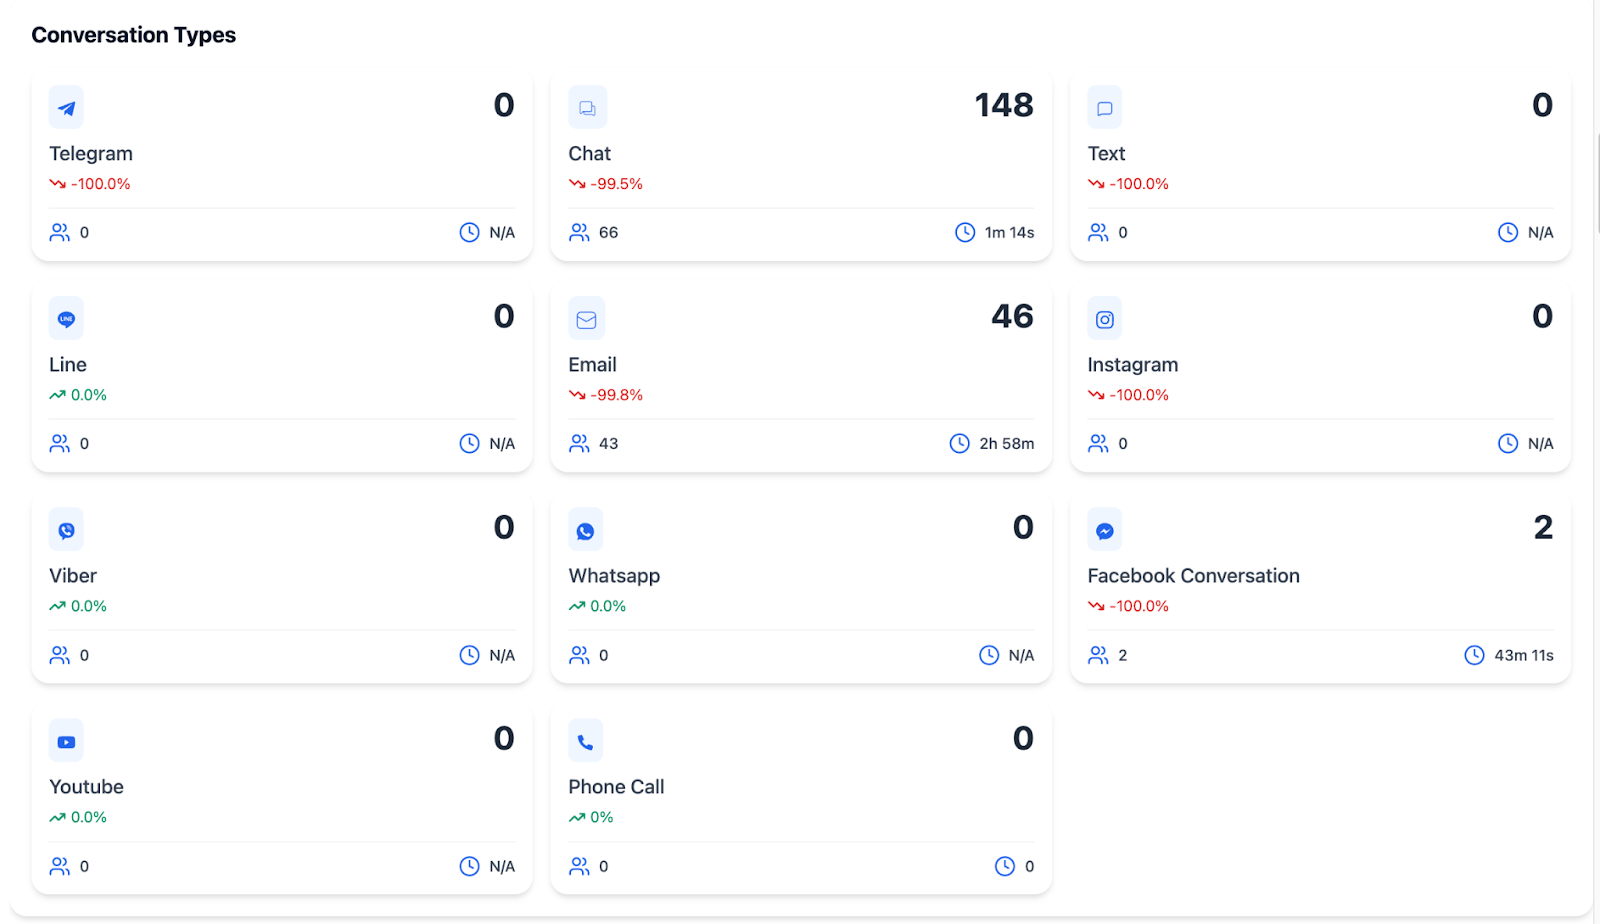
For Each Conversation Type:
- Conversation Count: Total conversations
- Unique Clients: Individual clients represented in the conversations for that type.
- Average Duration: Average amount of time conversation took to complete, from start to finish.
- Trend Indicators: Directional change percentages compared to previous periods.
Managing the Conversation List
Customizing Your View
Control how conversation information is displayed.
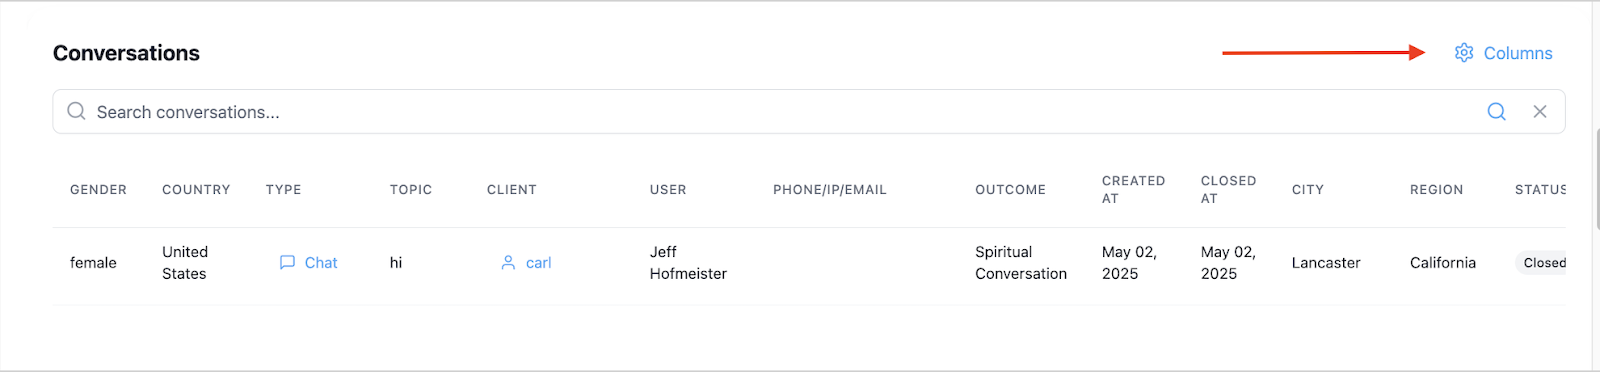

Customization Features:
- Show/Hide Columns: Control visible information fields by clicking on the eye icon.
- Drag and Drop Reordering: Arrange columns in preferred sequence
- Persistent Settings: Preferences save for future reports
- Quick Access: Essential information prominently displayed
Filtering Within Results
Refine the conversation list using the integrated search function.
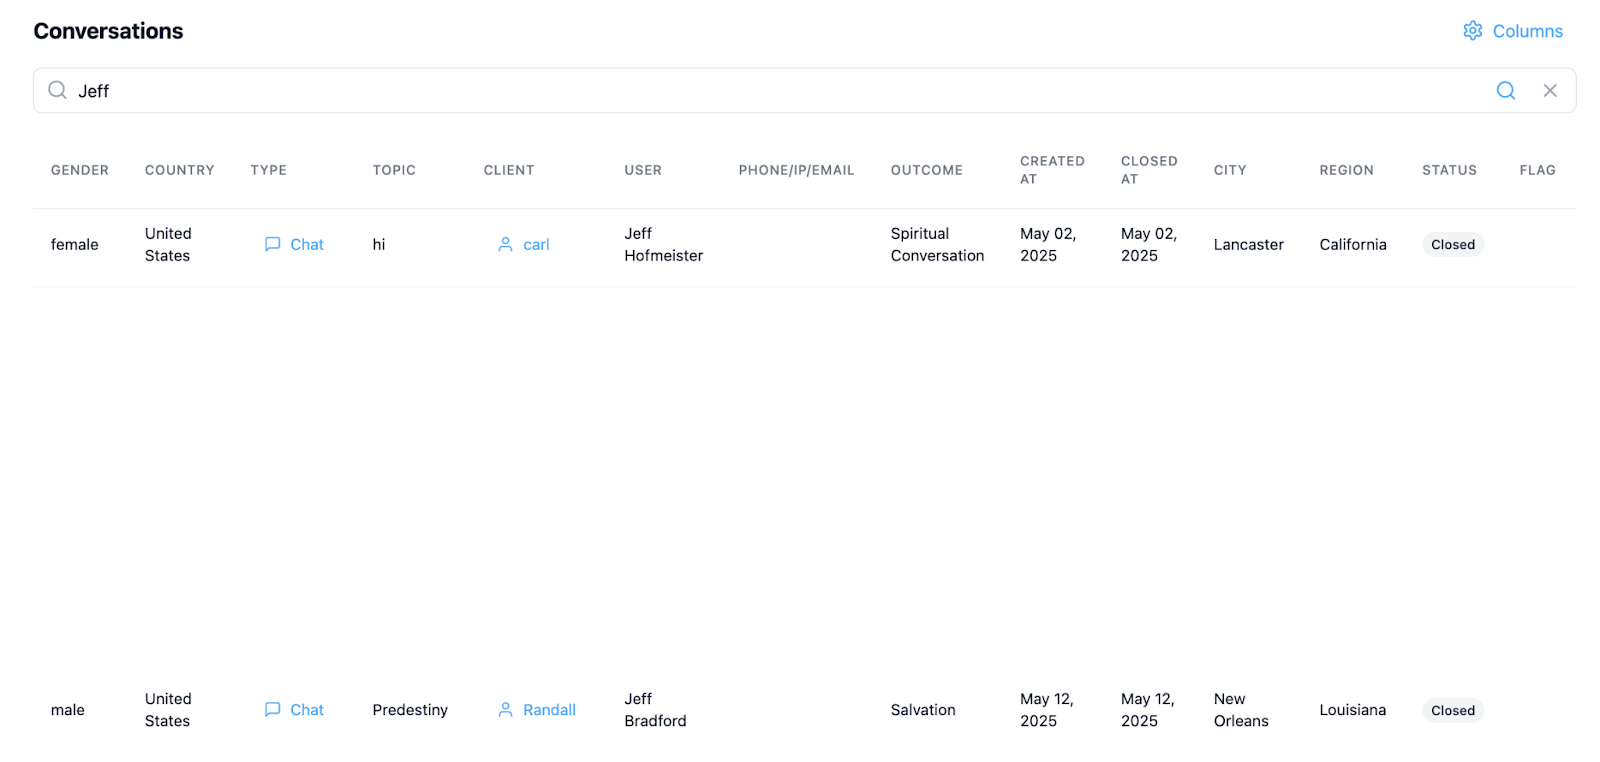
Search Capabilities:
- Team Member Names: Find conversations by assigned user (responder, coach)
- Client Information: Locate specific client interactions
- Real-time Filtering: Results update when you hit the enter key on your conversation search.
- Clear Function: Easy reset to show all results when you remove the search word and hit the enter key, or by clicking on the X at the end of the search row.
Interactive Elements
The conversation list includes clickable elements for detailed access.
Interactive Features:
- Conversation Type Links: Click on the conversation type to open full transcripts
- Client Name Links: Click on the client name for direct access to CRM client records
Best Practices
Planning Your Analysis
Start with clear objectives:
- Define specific questions you want to answer
- Choose appropriate date types based on analytical goals
- Start broad, then narrow with additional filters
Develop efficient processes:
- Create saved searches for frequently needed reports
- Use descriptive naming conventions
- Leverage email delivery for large reports
Troubleshooting
Common Issues
Report Generation Problems:
- Timeout Errors: Switch to email delivery for large reports
- No Results: Verify date ranges and filter combinations
- Missing Conversations: Check source selections and permission settings
- Slow Performance: Reduce date range or limit simultaneous reports
Unexpected Results:
- Review each filter category for proper configuration
- Test with broader filters first, then add specificity
- Verify demographic data availability for demographic filters
- Check tag assignments if tag-based filtering produces unexpected results
Email Delivery Issues:
- Verify email address in profile settings
- Check spam/junk folders for notifications
- Allow sufficient time for large report processing
- Contact support if emails consistently don't arrive